System Requirements
15 May 2019
Welcome to Blog#3 for team SPENDEMON. In this blog, we would like to delve deep into the actual implementation process for our App. In the previous blog we looked into the user aspects of the App with the User stories and the Use-Case Diagram. In this blog we will look more into the implementation level of the App with Activity diagram and Class diagrams. We try to explain each aspect of these diagrams in detail for better understanding of the user and you our readers! So, let us begin..
Activity Diagram:
We present here two Activity Diagrams for our App, namely:
-
Login Activity
-
Add Entries Activity.
Login Activity:
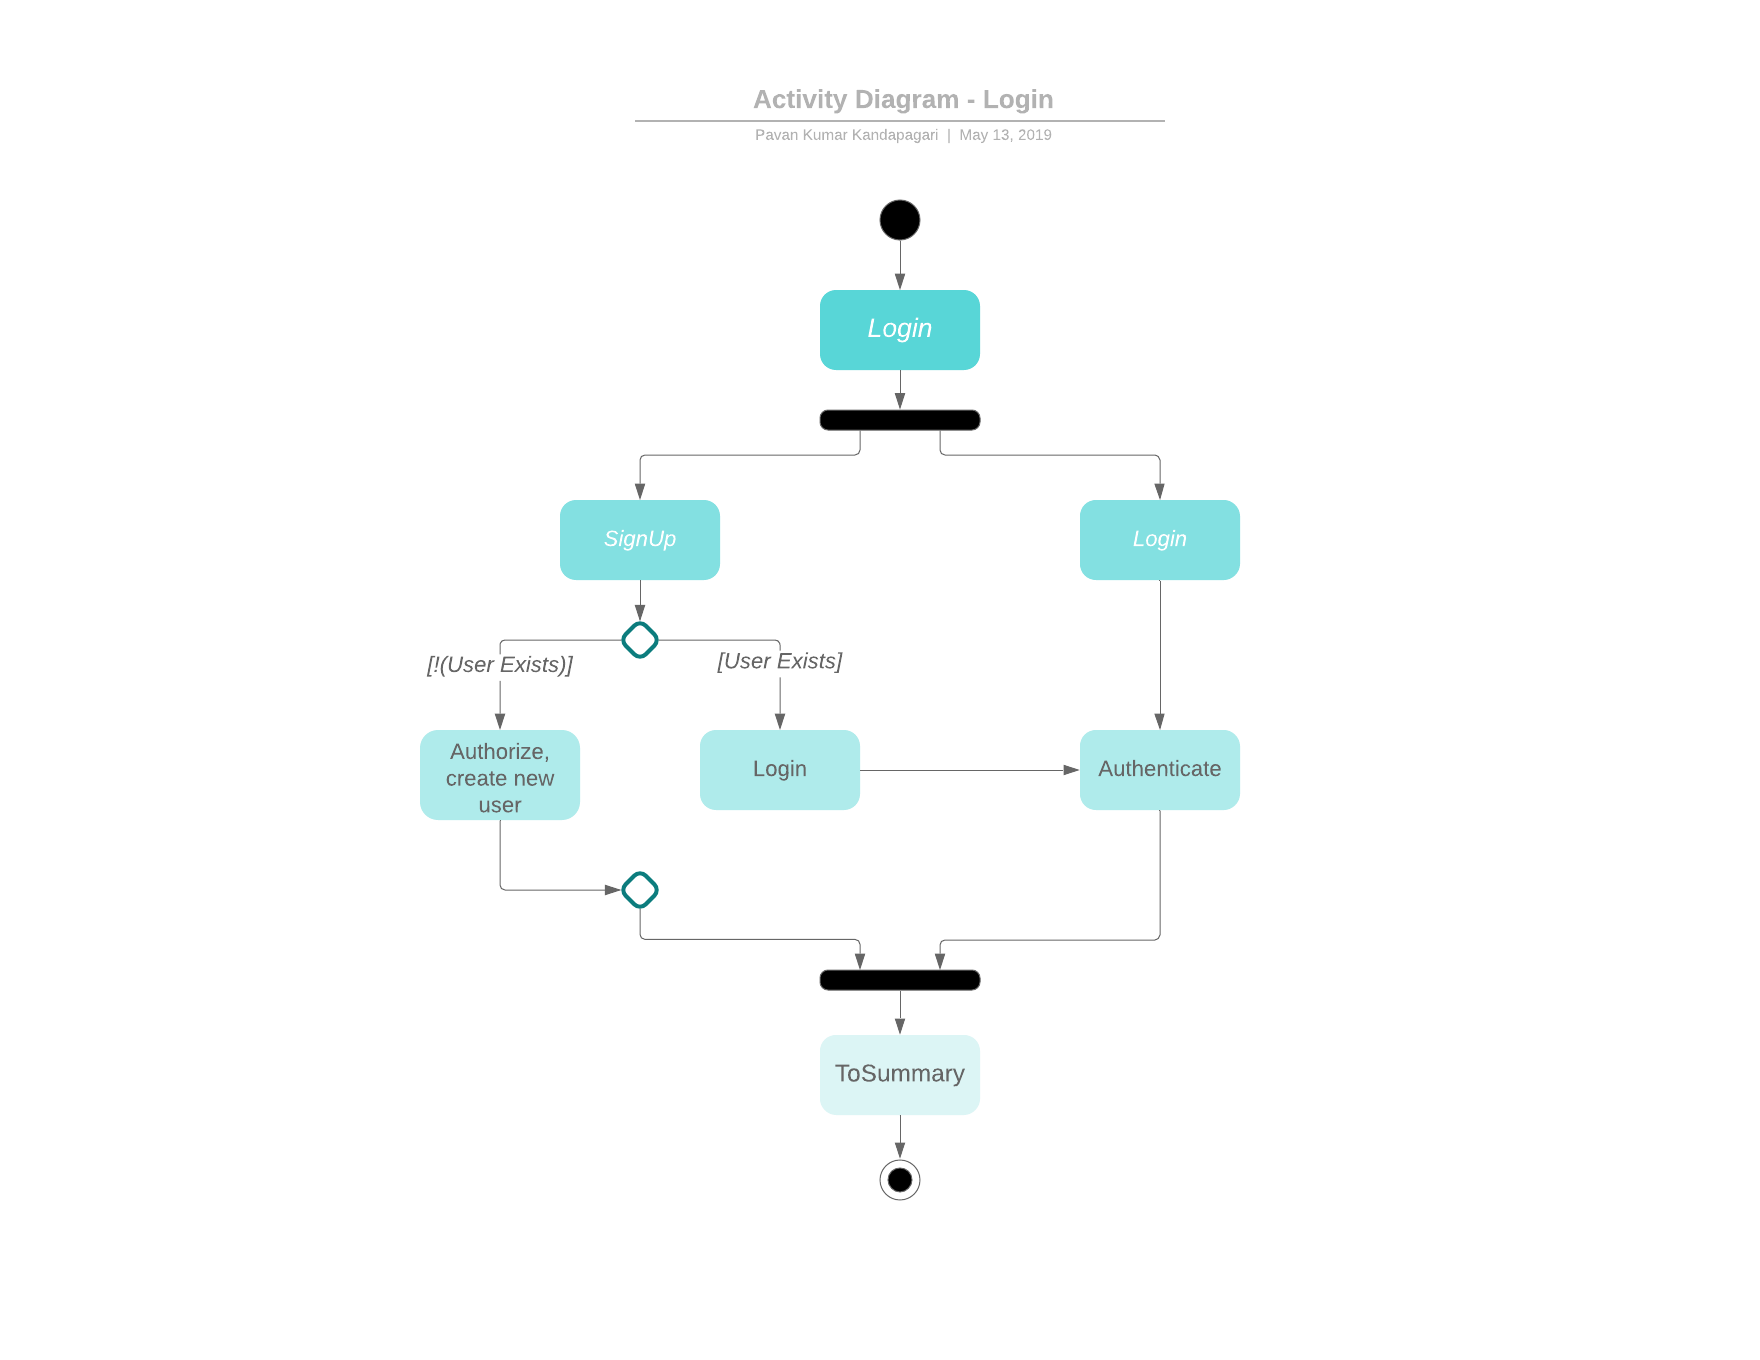
This activity diagram, depicts the entry point of the user into the App. We shall look at each activity one at a time.
Sign-Up: Incase of a first time installation of the app, the user will be required to add his/her signup details (Username and Password) into the Sign-Up activity which has a condition for a new and an existing user. Incase of the former, the Sign-Up details are used to create a new account and to authorize the user into the Summary page.
Login: The Login activity is used to authenticate an existing user. On correctly entering the Username and Password, the user shall be directed to the Summary page of the App.
Summary: This page displays all the added expenses and incomes of the user sorted on the basis of the most recently added.
Add Entries Activity:
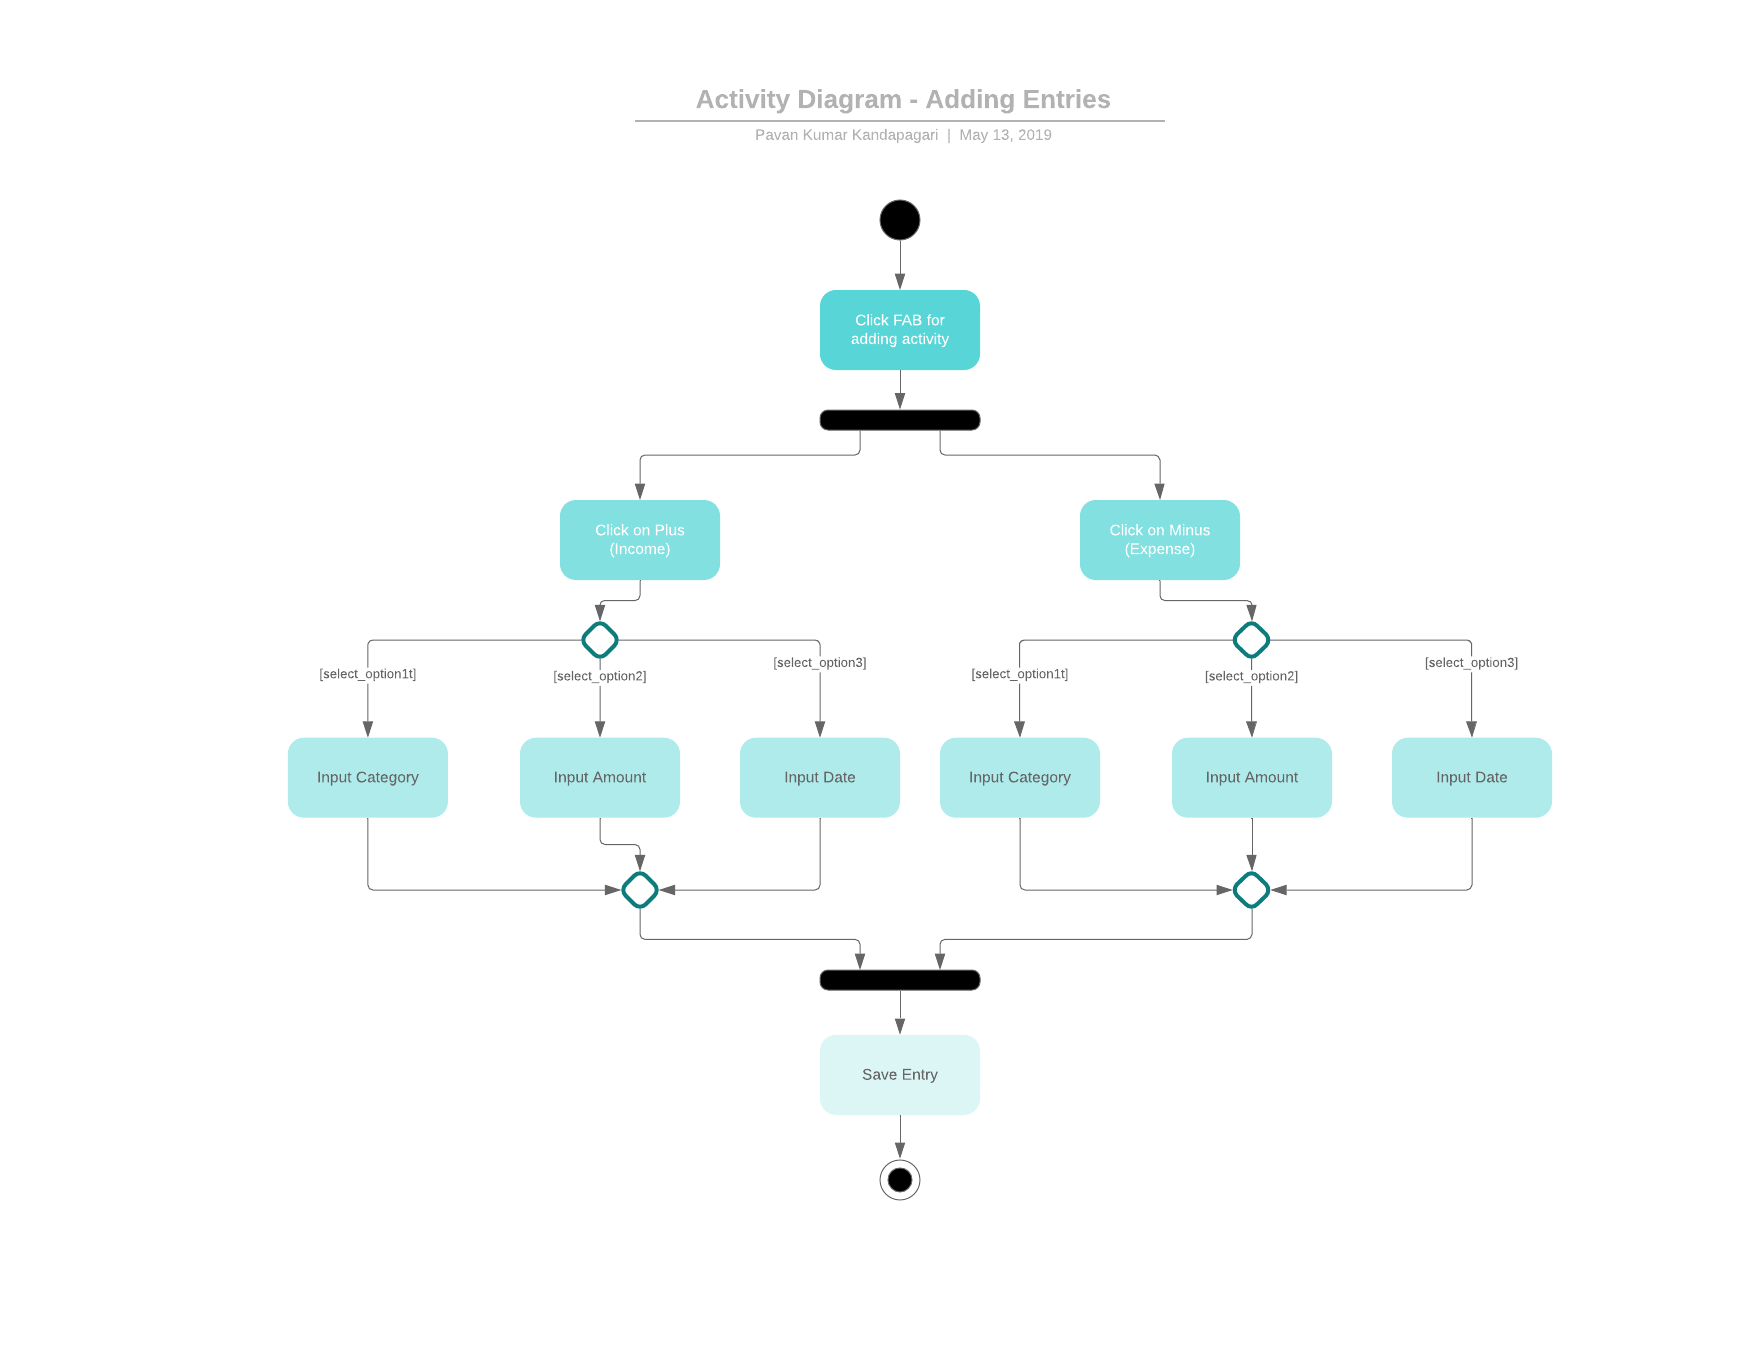
This is the basic editorial page of our App where the user can add and edit incomes and expenses to the Summary page.
Add Button: This is a FAB created to take into account the Incomes of the user. The user is then taken to the main edit page where he/she can edit their income details.
Minus Button: This FAB, like the Add Button, takes into account the user’s Expenses and add details in the main edit page.
Input Category: This is a drop down menu which gives some sub categories for the Income (like Salary, Allowance etc.) and Expense (like Restaurant, Travel etc.) fields.
Input Amount: The amount for each case can be entered in here.
Input Date: The date for the specific Income and Expenditure is added here.
Save Button:
Class Diagram:
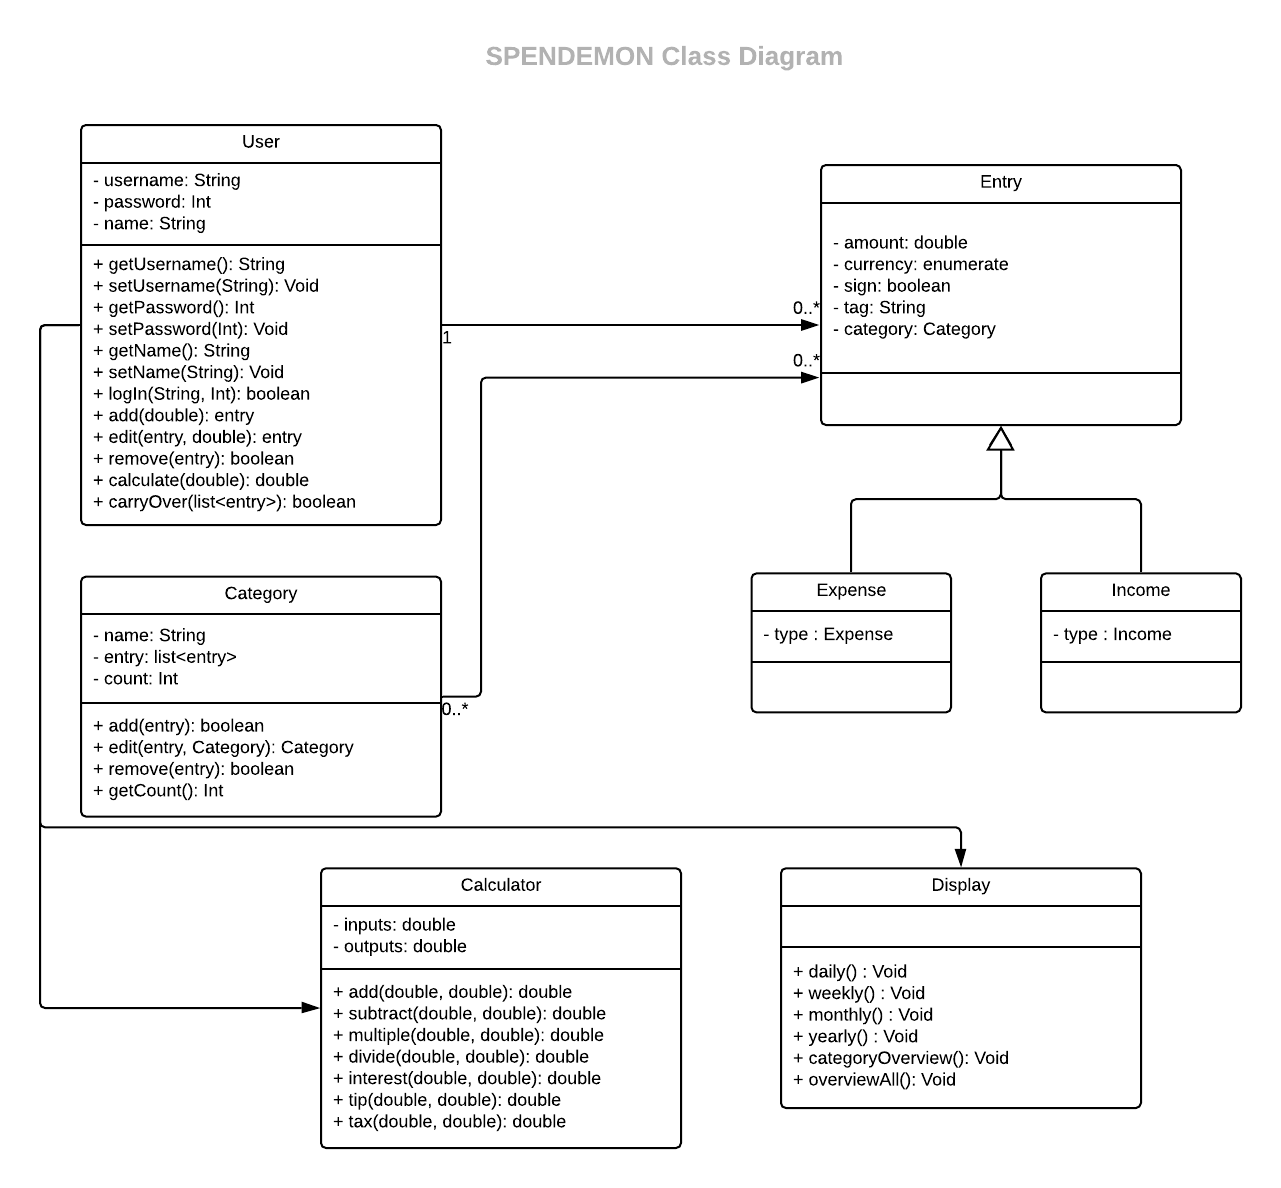
User Class: This class is used to store all User information plus helps in interaction of the User with the App.
-
Attributes: username, password and name
-
Methods: Along with the usual getters and setters methods we also have the below mentioned methods,
-
login(): for authentication.
-
add(): to add entries.
-
remove(): to remove entries.
-
calculate(): to do various calculations.
-
carryOver(): to get the balance.
-
Entry Class: This class is the model on which our App is built on.
- Attributes: amount, currency, sign, tag, category.
Category Class: This class is used for defining the pre-existing categories.
-
Attributes: name, entry, count
-
Methods:
-
add(): for adding entries into categories.
-
edit(): for editing entries in categories.
-
remove(): for deleting entries from categories.
-
Expense Class: This is a class generalised from entry to store expenses.
- Attributes: type
Income Class: This is a class generalised from entry to store incomes.
- Attributes: type
Display Class: This is a class used for displaying a summary of the expenses and incomes in a sorted manner.
-
Methods:
-
daily(): for displaying everyday summary.
-
weekly(): for displaying weekly summary.
-
monthly(): for displaying monthly summary.
-
yearly(): for displaying yearly summary.
-
Calculator Class: This class is used for displaying a built-in calculator for quick calculations.
-
Attributes: inputs, outputs
-
Methods:
-
add(): adds two doubles.
-
subtract(): subtracts two doubles
-
multiply(): multiplies two doubles
-
divide(): divides two doubles
-
interest(): calculates the interest rates for loans etc.
-
tip(): calculates tips based on bills in Restaurants.
-
tax(): calculates taxes based on Incomes.
-
Final Thoughts:
The usage of the Class Diagrams and Activity Diagrams were immensely helpful during the implementation process and eased our struggles with Android and Java. It gave us a template and structure to follow, such that we could keep track on the progress of our development phase and would not deviate.
The next task will be to illustrate before our users the Implementation procedures and also design a GUI for interactive usage of our application. Hope to make an interesting read for you again..
See you soon!! Tschüss!!