Advanced Prototype
04 June 2019
Welcome to Blog#4 for team SPENDEMON. We are happy to see you again. In this blog we would like to talk about the design pattern that we have implemented for the App and talk about the reasons for doing so. We also talk about the coding conventions we are implementing and the measures taken by us to ensure that we follow the conventions. We also talk about the kind of users that are likely to find our App useful and how we have added to our prototype to include the demands from the users. We have for the first time also included some screenshots of our App for better Visualization.
If you would like to skip the blog read and just check our App click here
Design Pattern:
When we started with the research for the Design Pattern, we wanted an architecture which could help us combine multiple features like accessing the Database, Configuration changes, Data Binding etc. with one design implementation. Hence we decided to opt for the View Model architecture design which combines multiple features we needed and also had scope for expanding the features in the future.
The View Model architecture basically has a structure as below:
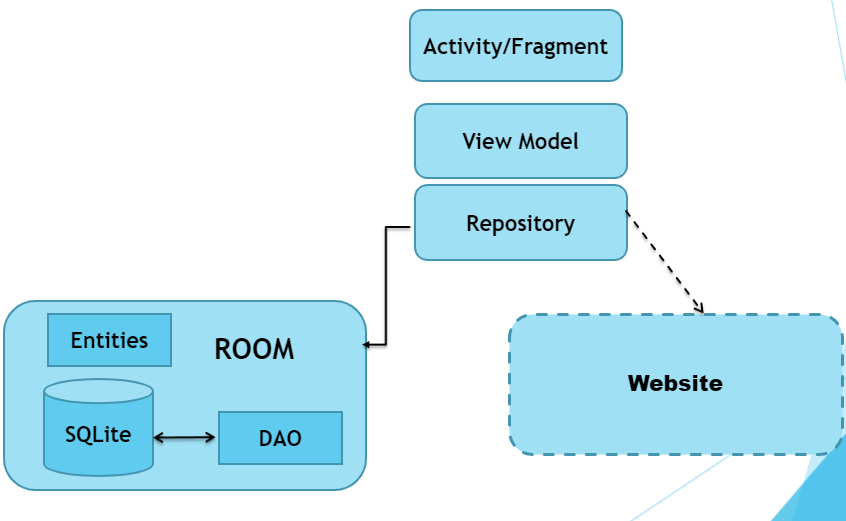
Activity/Fragments: This basically is the top most level of the UI and represents all the activity interfaces that we have in the App that the user interacts with. For us we have the Summary, Edit Data, Pie Charts (Daily, Monthly, Weekly and Total) as activities.
View Model: This part of the Architecture takes care of any Configuration changes like App rotations and saves the Data even when the activity gets destroyed during configuration changes.
Repository: The Repository creates an abstract layer between the View Model and actual Database. This particular layer does not much add too much into our App just yet, but can be implemented later if we want to make our App online and access data from Websites.
Room Database: Room Database is an abstraction layer over the SQLite database which manages both local data as well as data from the Database.
-
Data Access Object: An Interface implemented in the Database class and contains the methods like insert(), update(), delete(), deleteAll().
-
Database: It extends the RoomDatabase class and stores all Entities that we pass from the App.
-
Entities: These are values that we send from our App to the Database and are stored in the Database.
Coding Conventions :
When working together in an Agile manner and following SCRUM methods one needs to follow certain conventions such that all team members work effectively and can communicate well. For us, we decided to implement the Google Java Style Guide coding conventions for Android. Here is a list of the coding conventions we applied:
-
Naming Conventions:
-
Java Classes/Interfaces: UpperCamelCase.java
-
Activity Java Files: UpperCamelCaseActivity.java
-
Activity Layout Files: activity_lowercase_name.xml
-
Fragment Files: fragment_lowercase_name.xml
-
Menu Files: menu_lowercase_name.xml
-
Method Names: lowerCamelCase
-
Constants: UPPER_CASE
-
Variables: lowercase_name
-
-
Source File Structure:
-
Package name
-
Import statements (Android statements, third party statements, java/javax statements)
-
One high level class
-
Overrides of methods
-
JavaDoc: All Source files and sections should have params, functionalities to be written before.
-
-
Line and Spacing Indentations:
-
basicOffset: 4
-
braceAdjustment: 0
-
caseIndent: 4
-
throwsIndent: 8
-
lineWrappingIndentation: 8
-
arrayInitIndent: 4
-
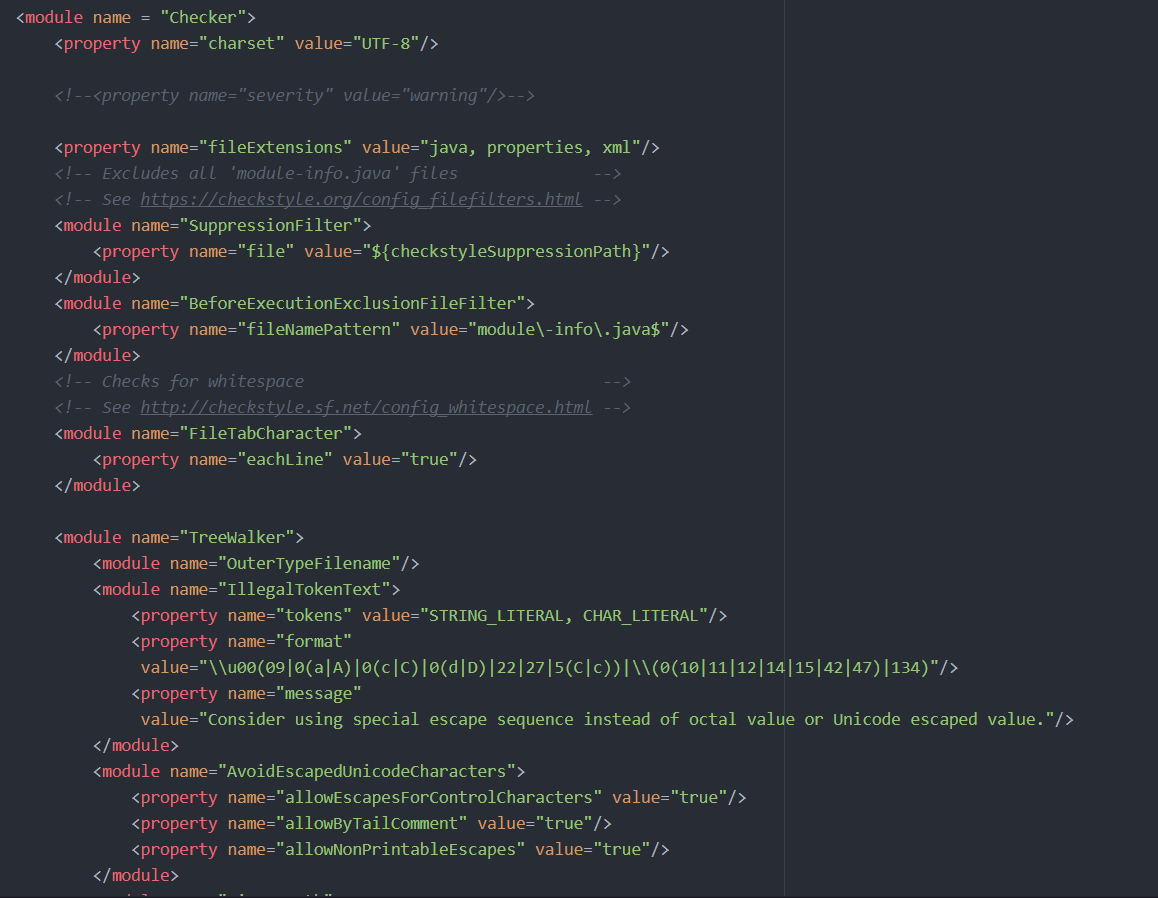
Checkstyle Tests Implemented:
In order to make sure that the coding conventions were being implemented properly, we created a Checkstyle test which when run, gives us the errors wherever we have not followed the conventions properly.
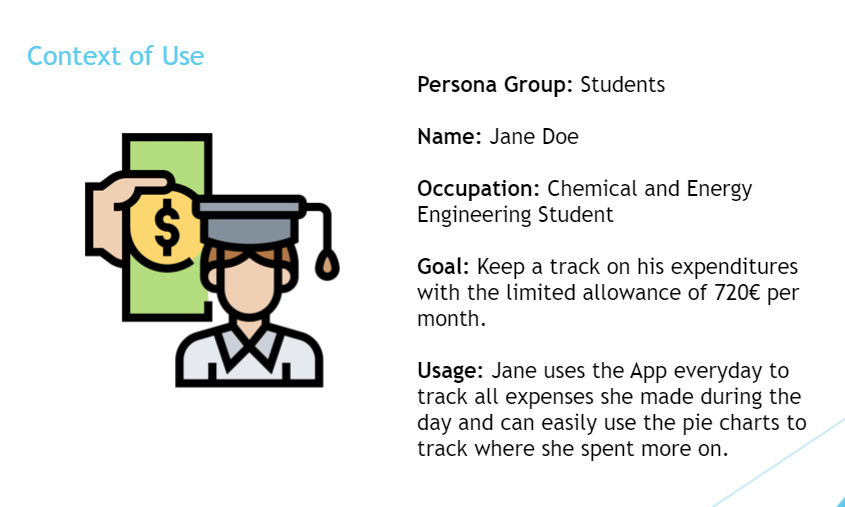
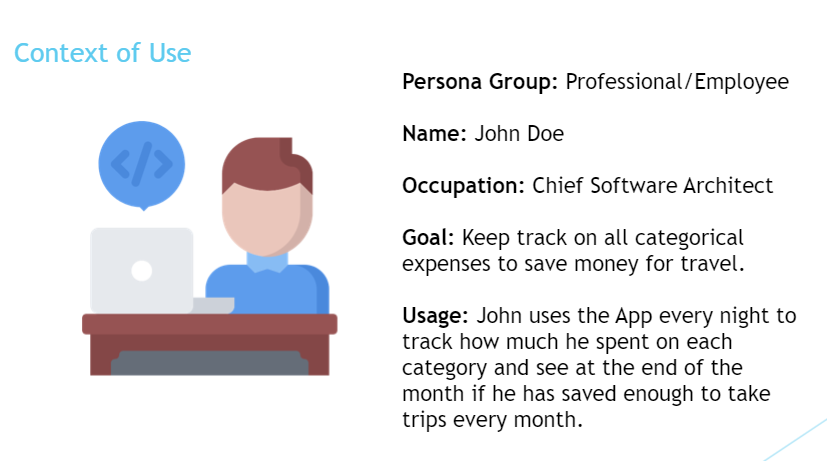
Context of Use:
While designing an App it is helpful to understand the kind of customers that the App is intended for and have an overview on what they expect off the App and also how we can make the App more tailor made for each customer.
For this reason, we have come up with two representative users who could find use in our App and tune our App such that we can make their needs and make more people use our Apps.
Design Solution:
Based on the user stories that we had, we tried to make the App as easily usable and as tailor made as possible. Here, we show two storyboards that shall display how our App functions.
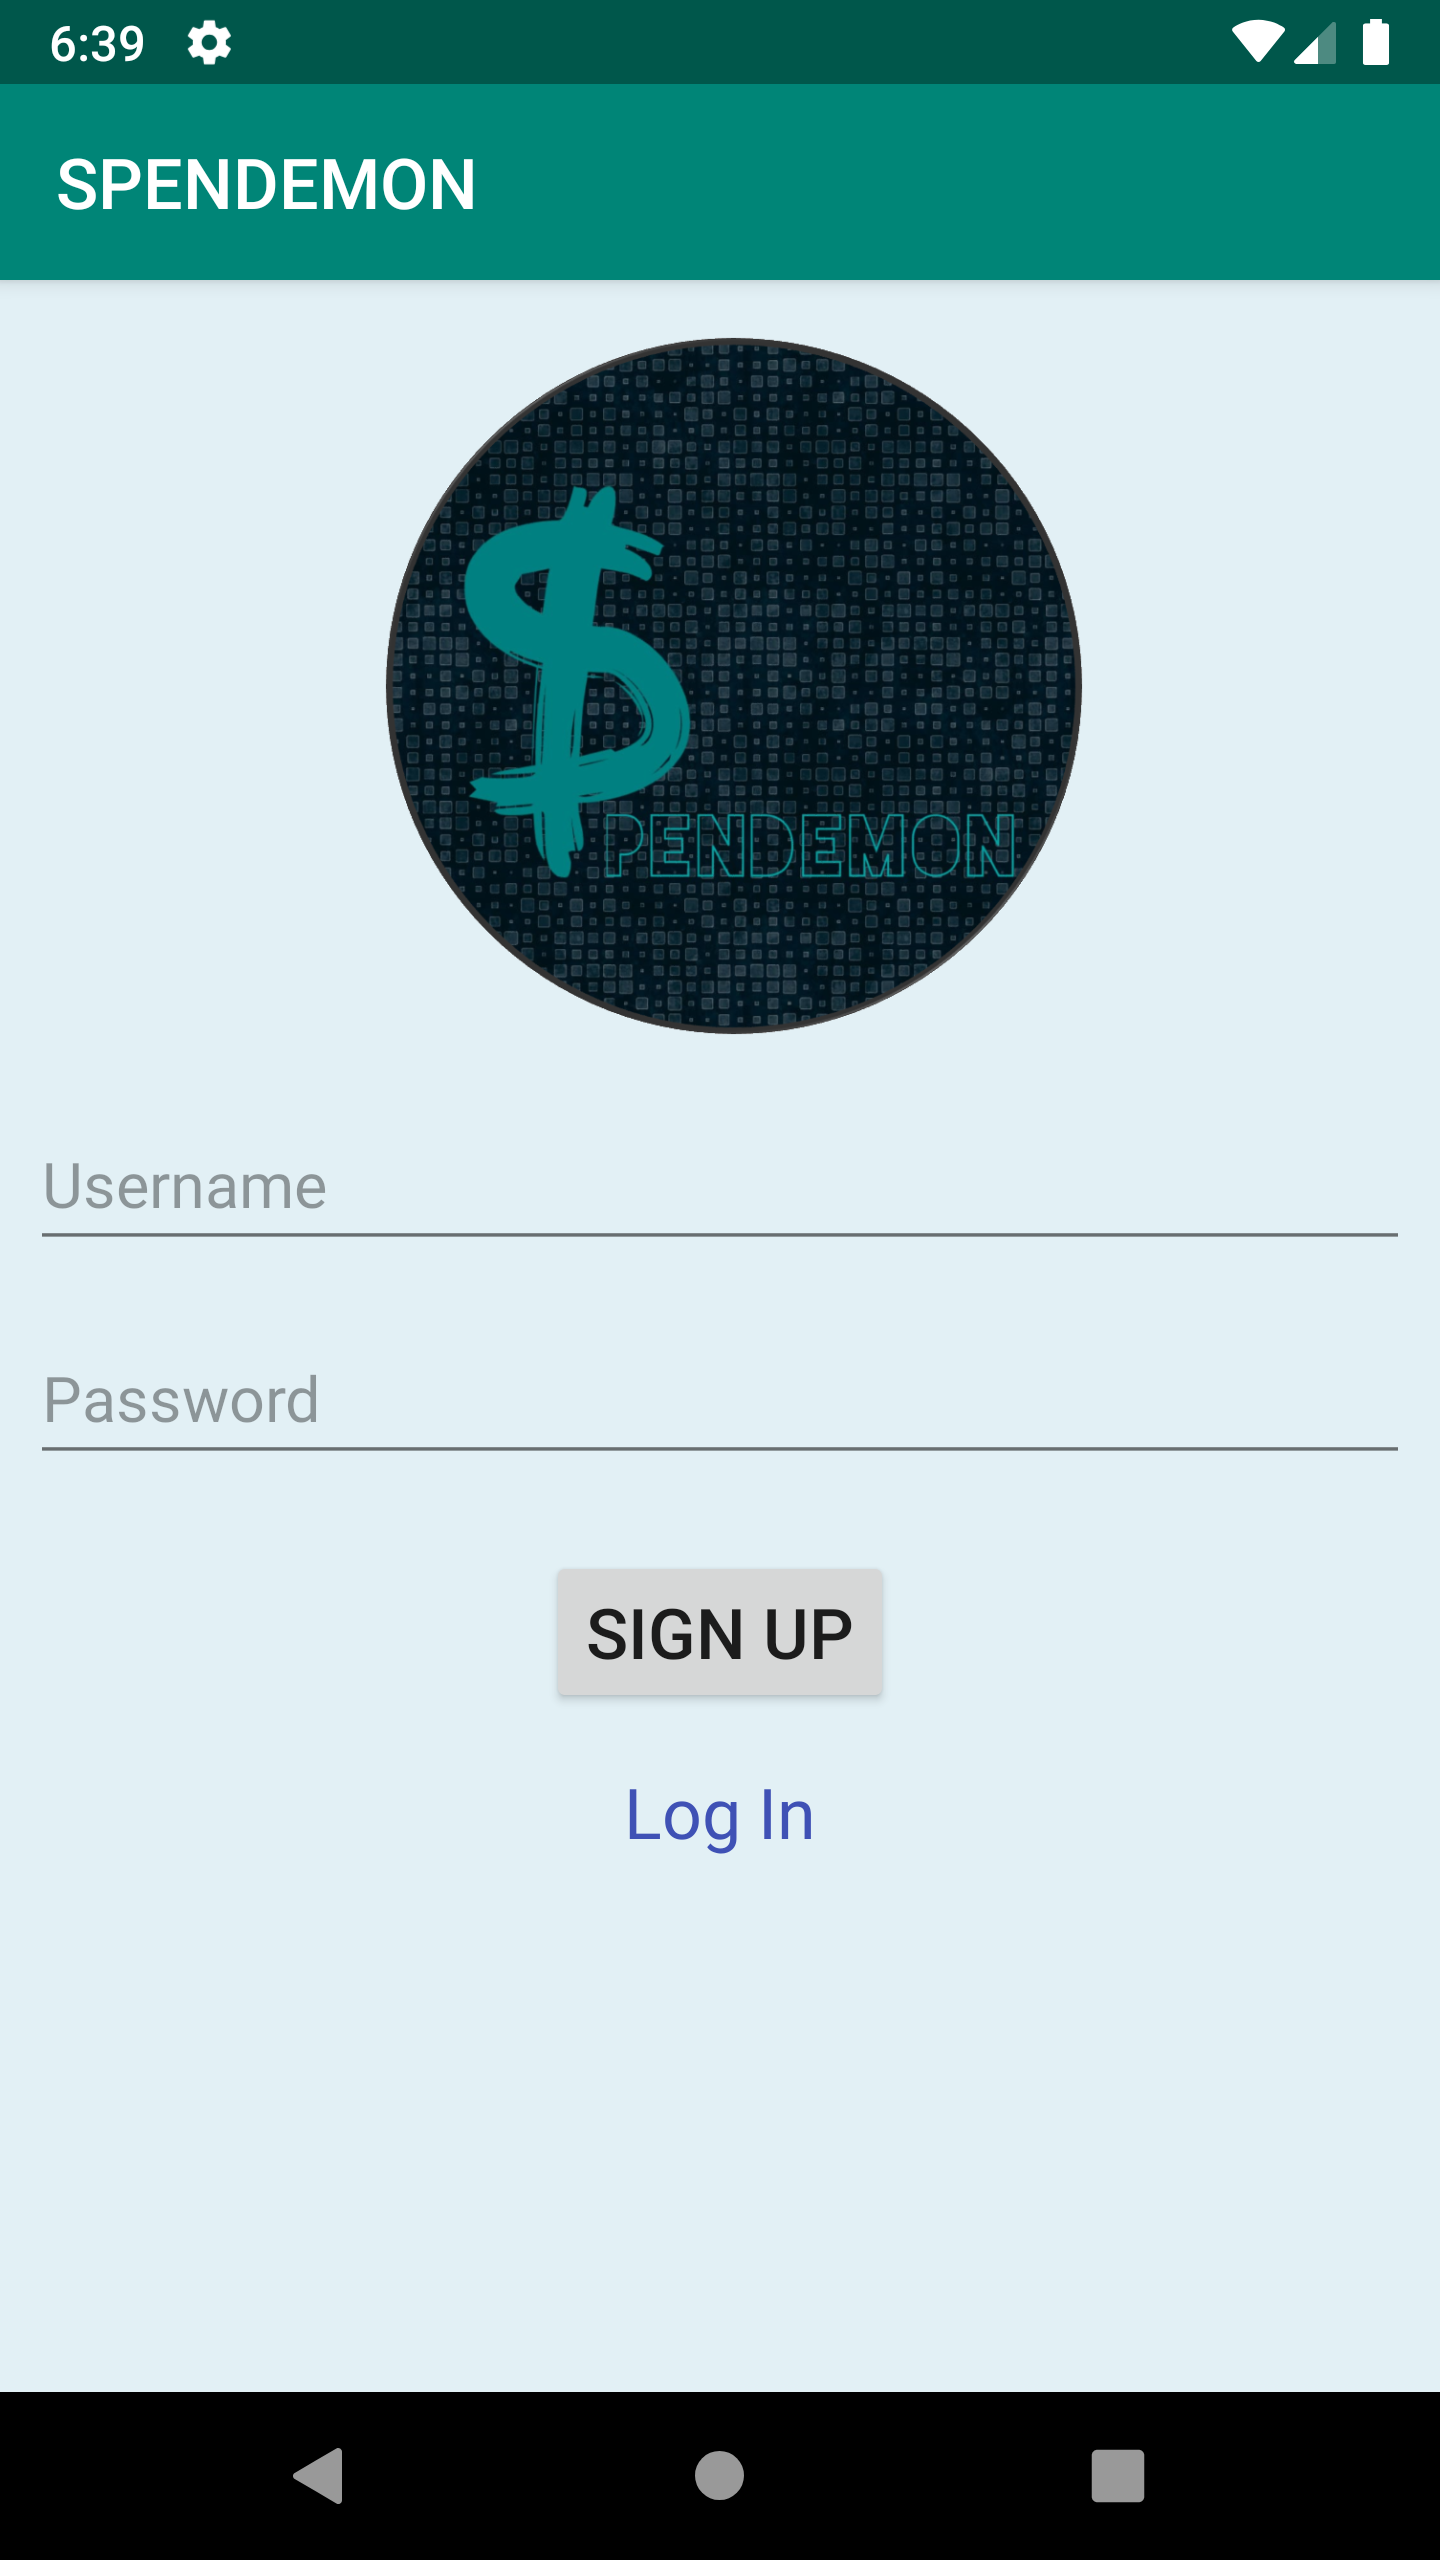
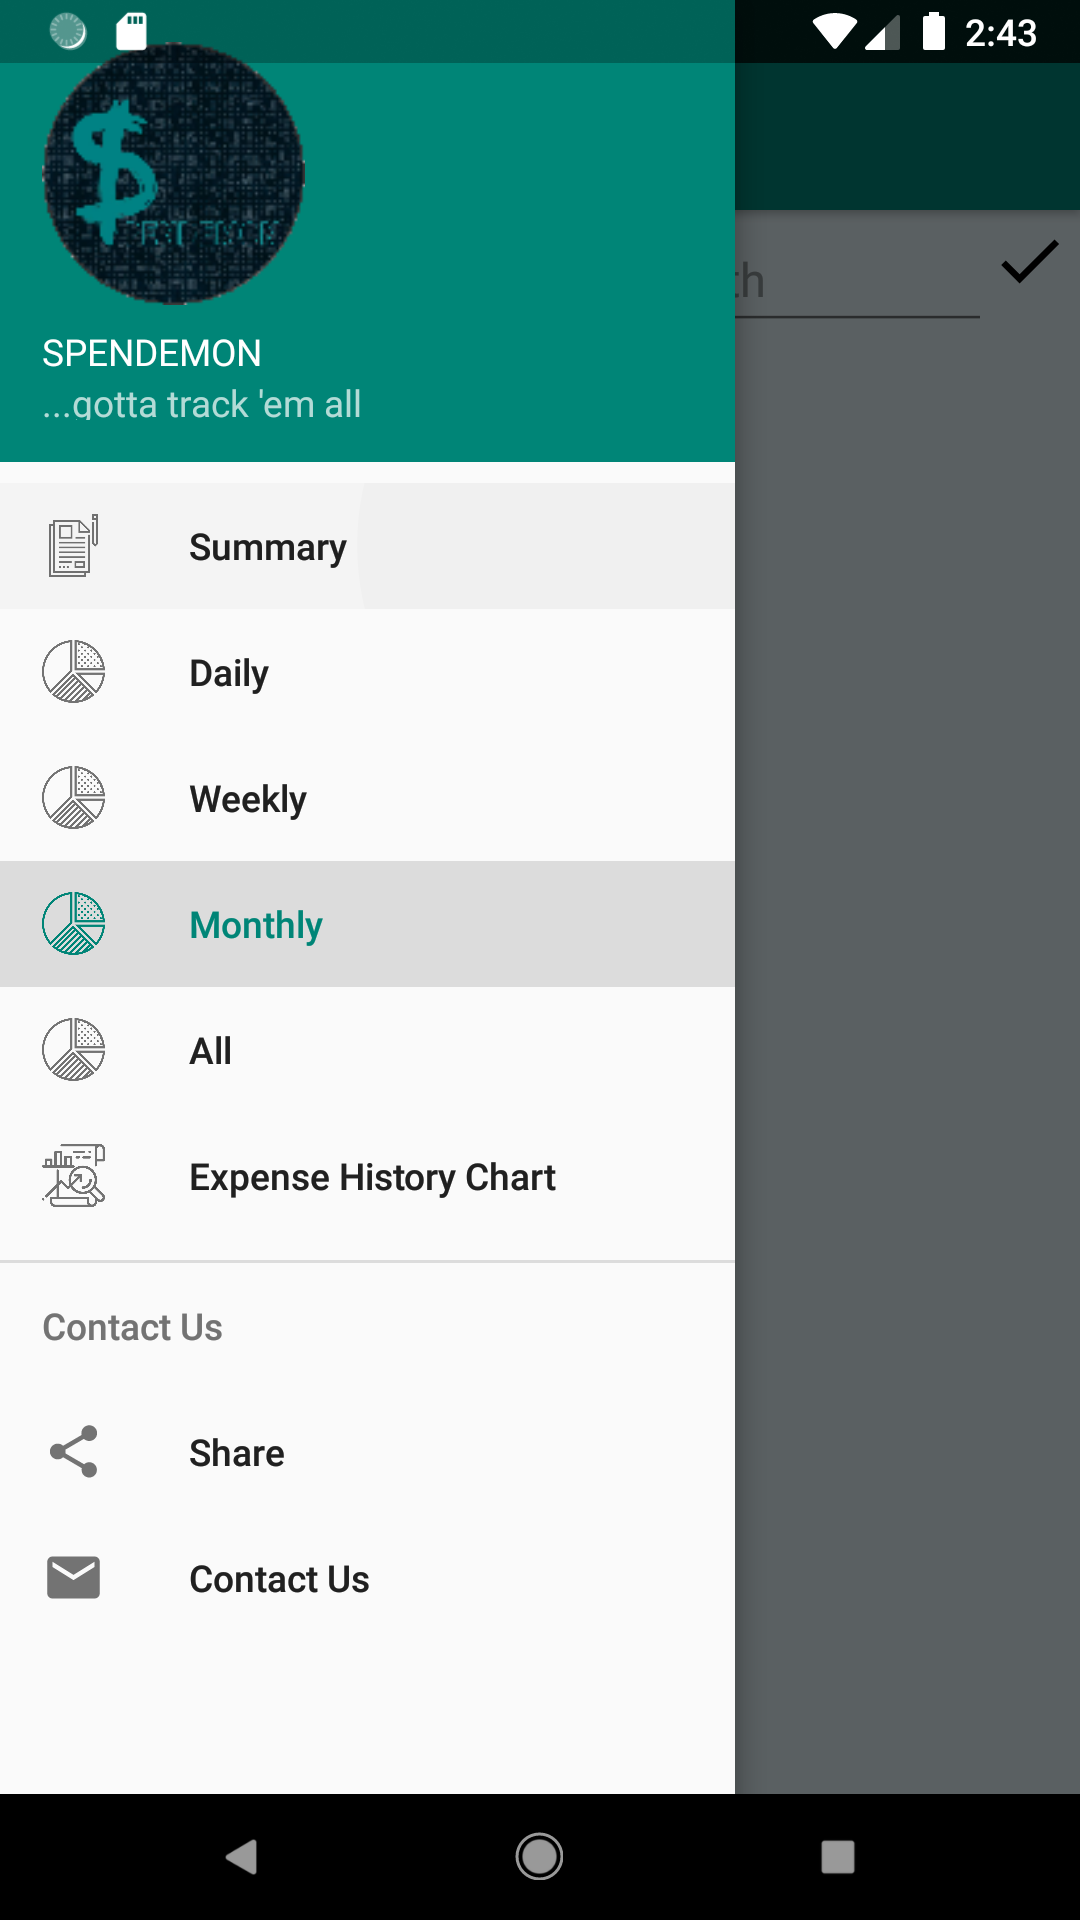
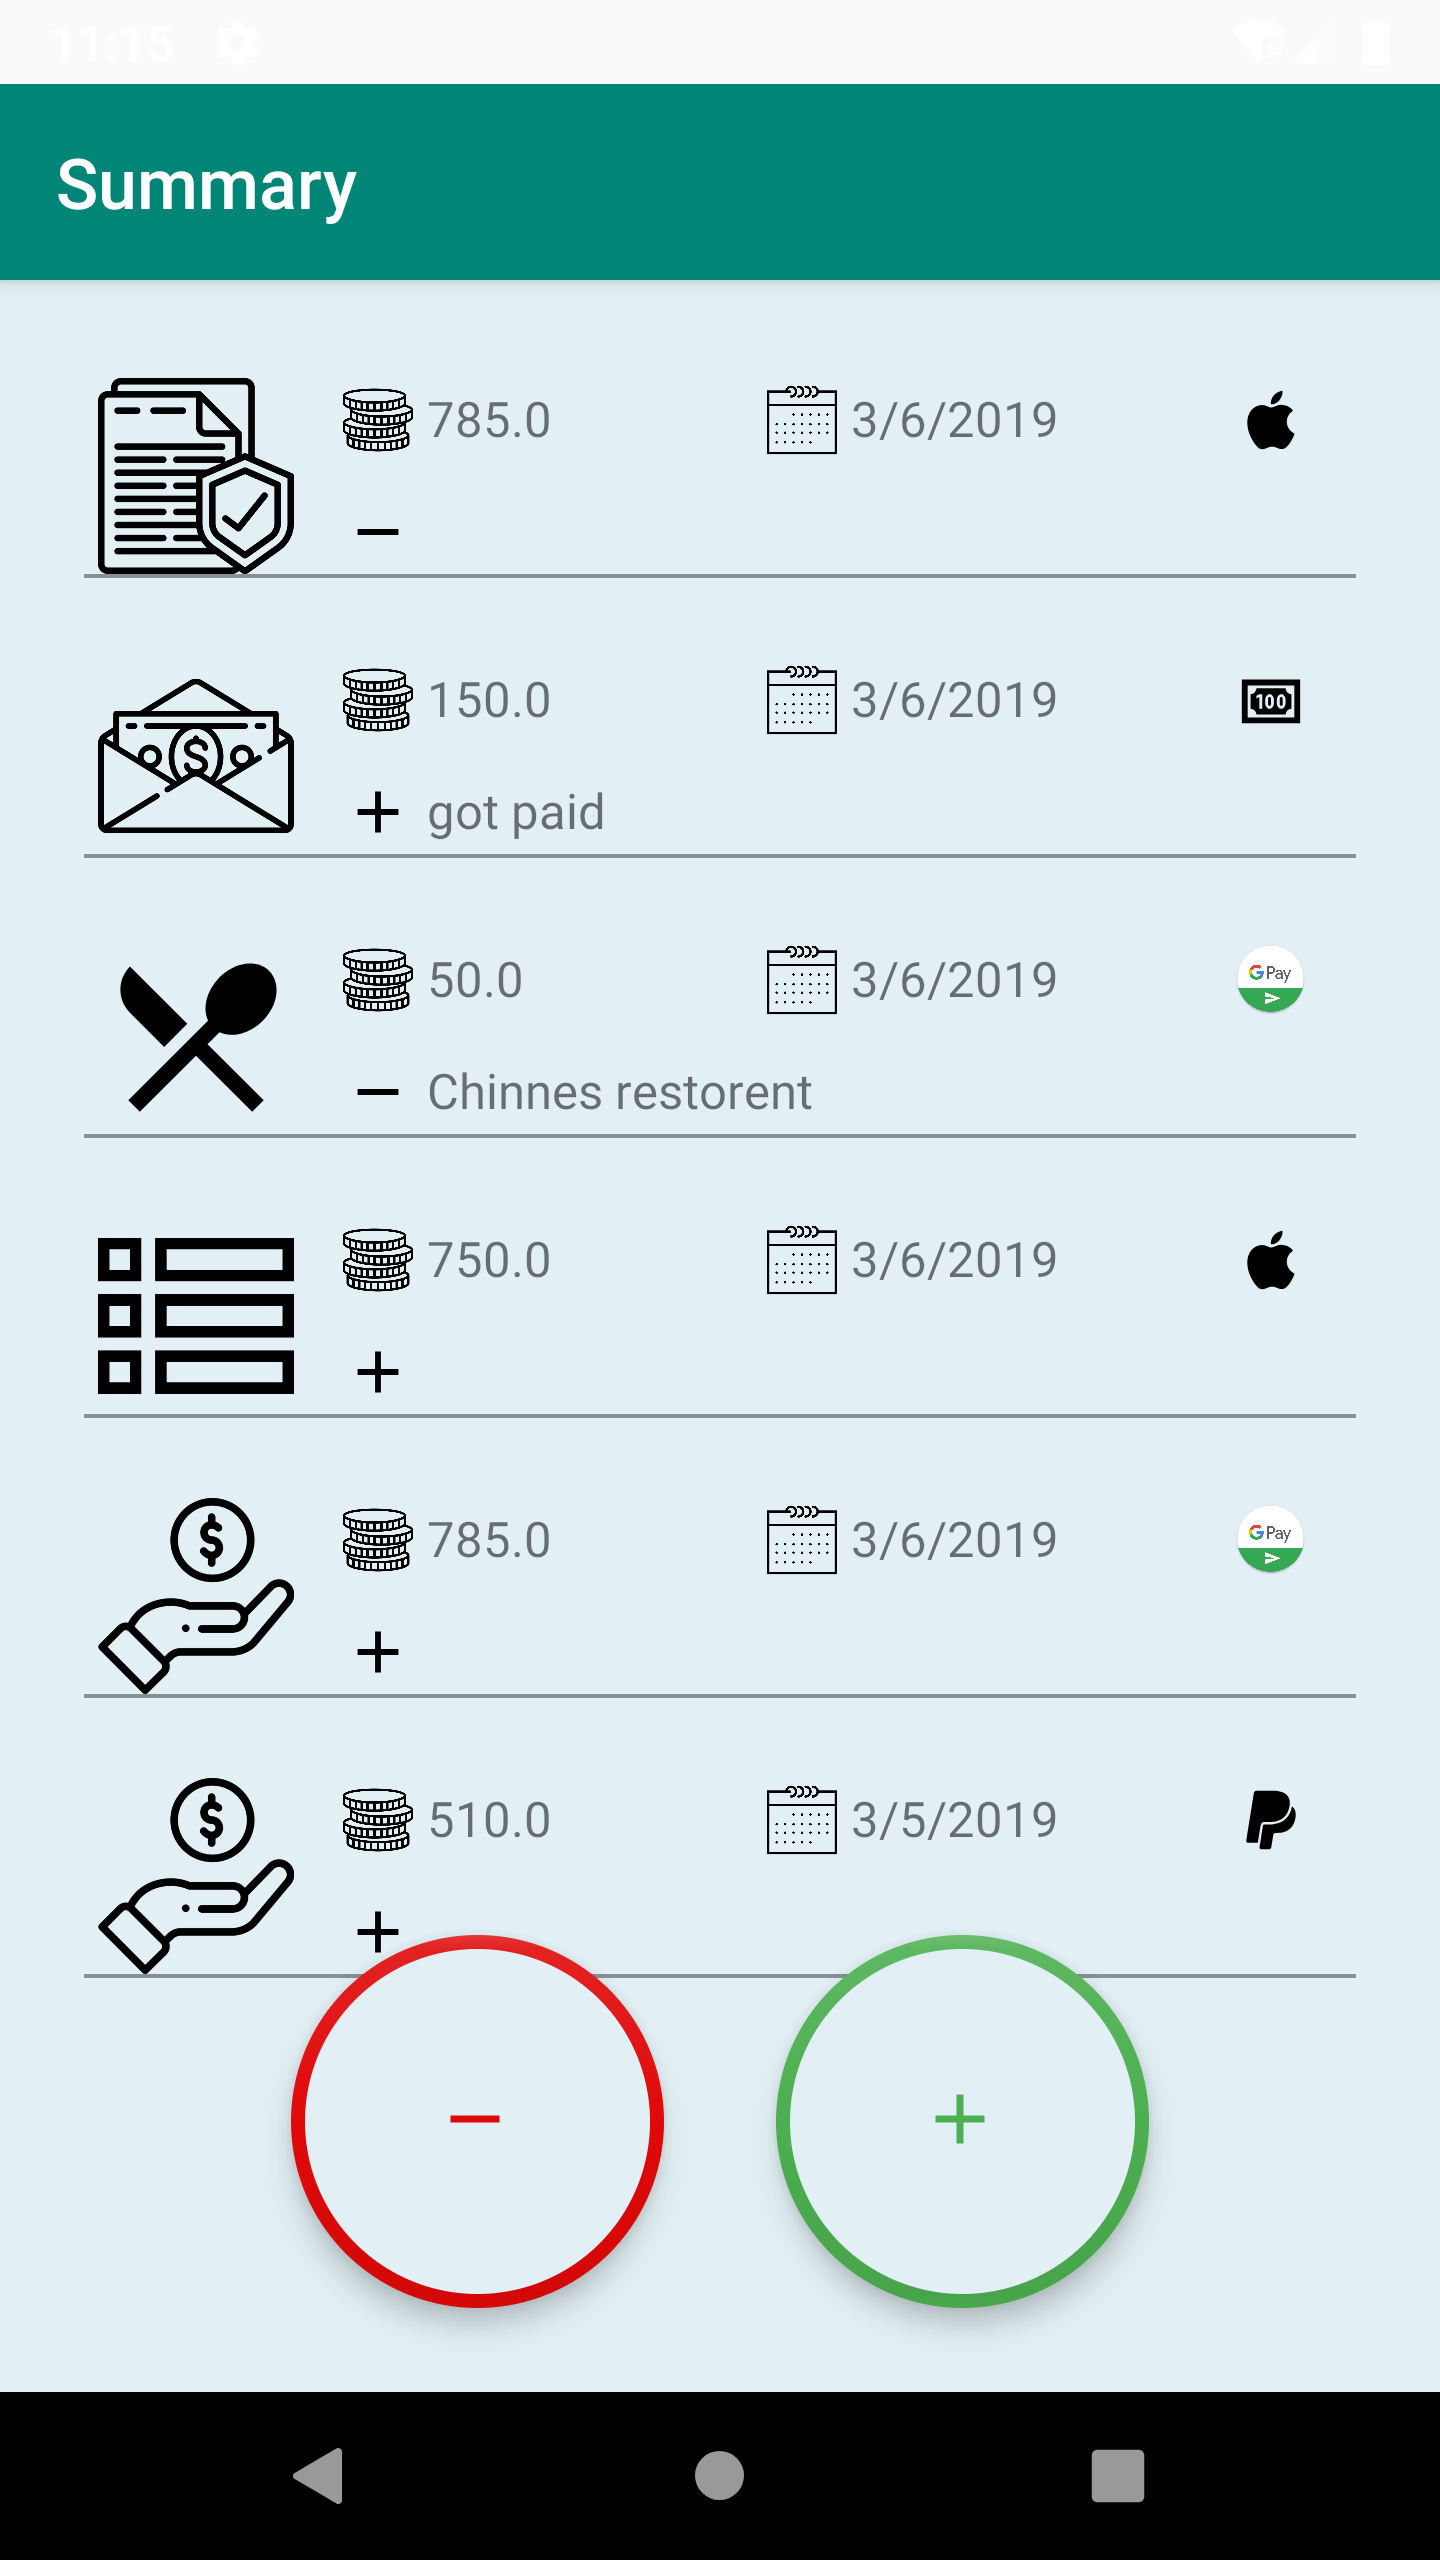
Storyboard 1:
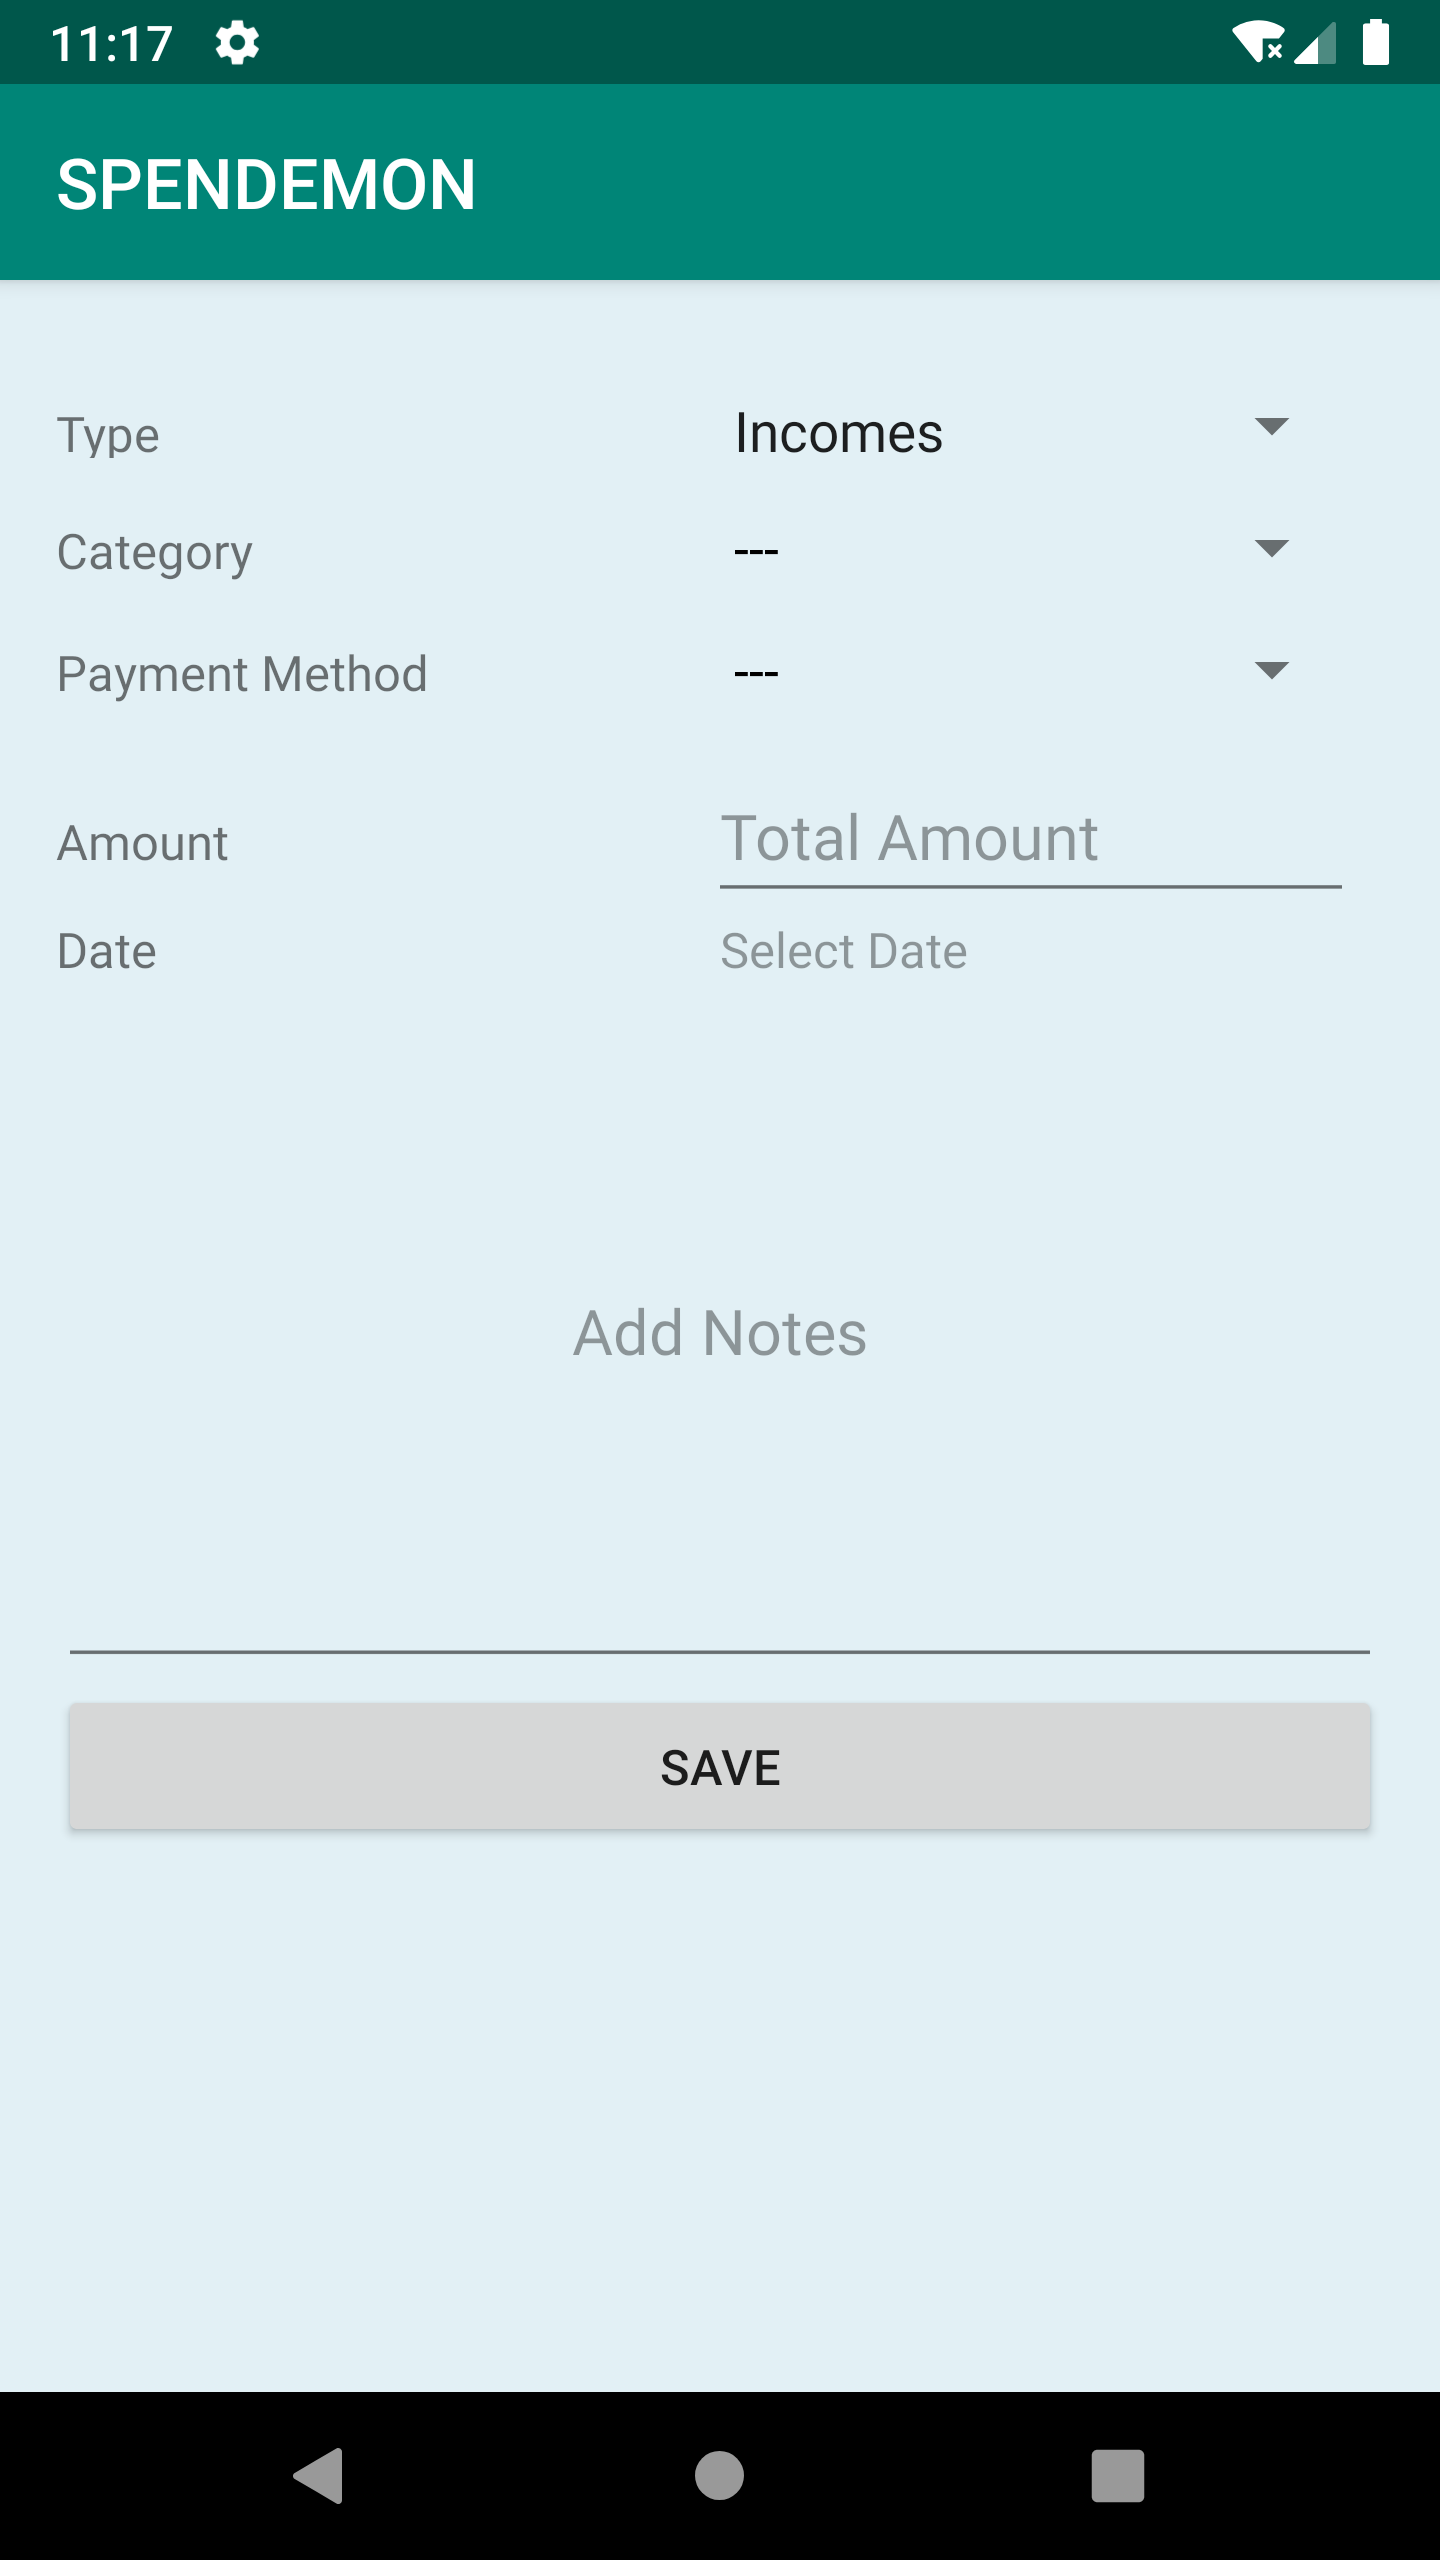
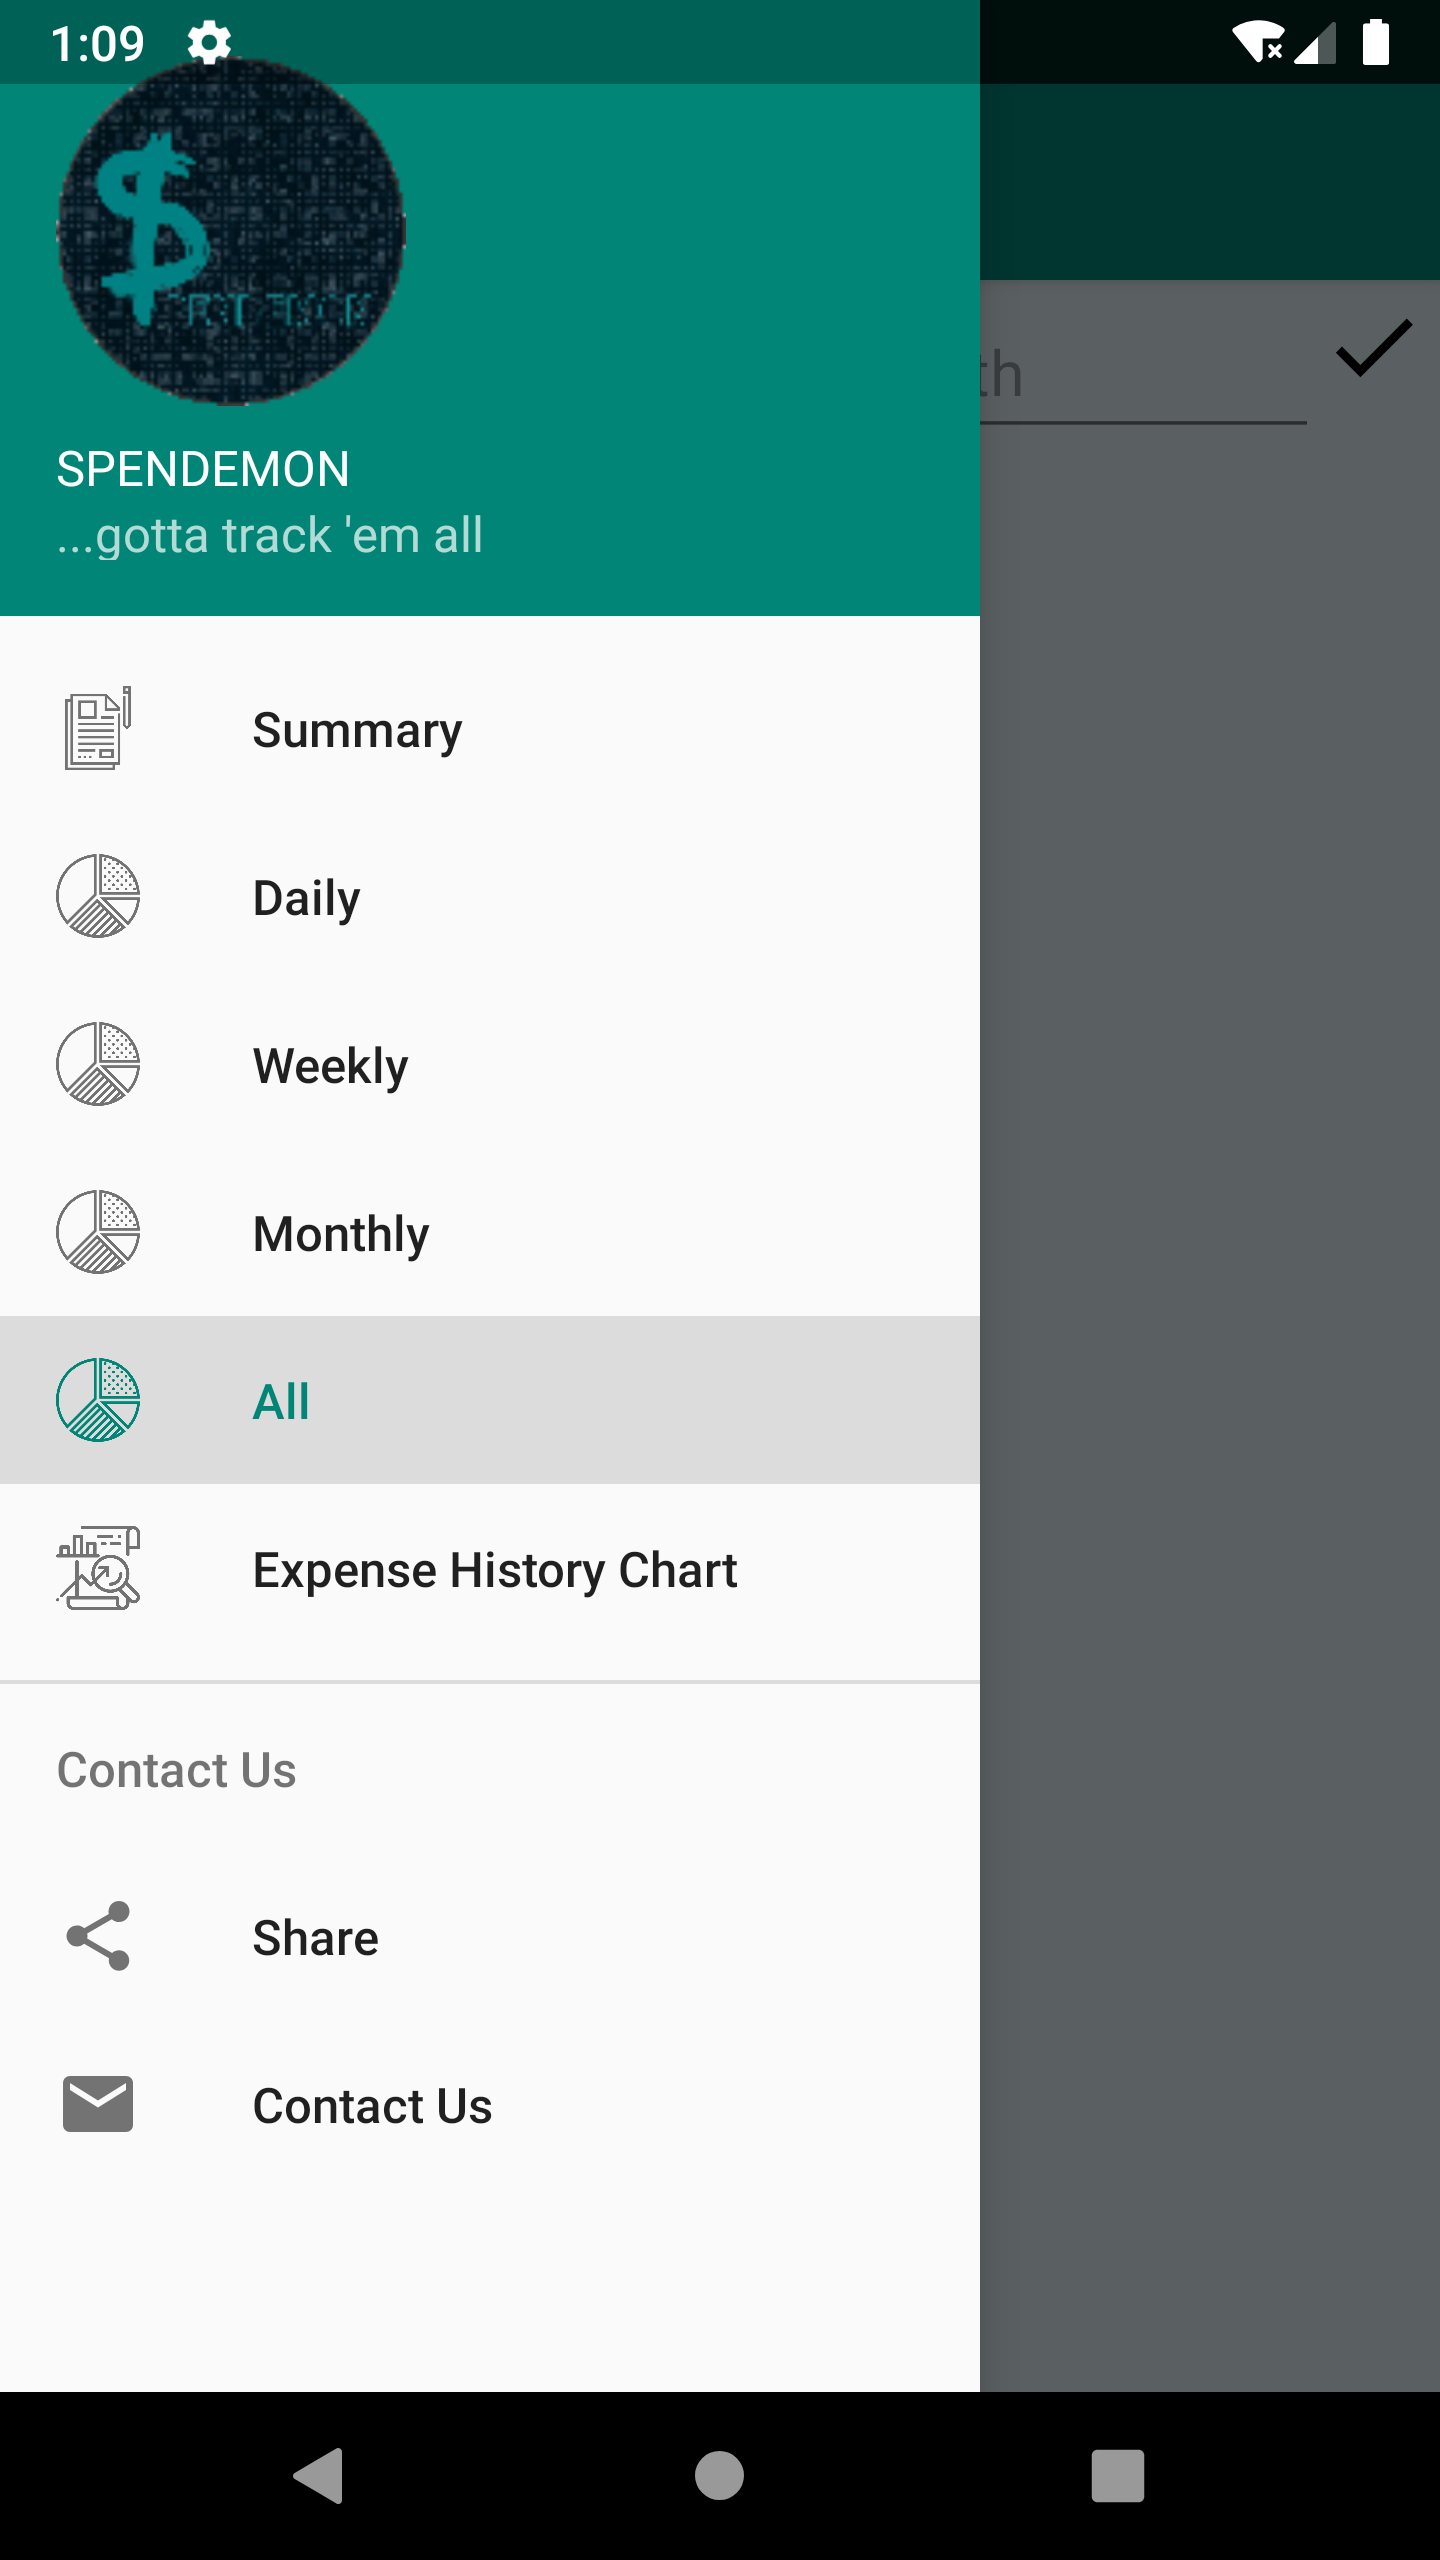
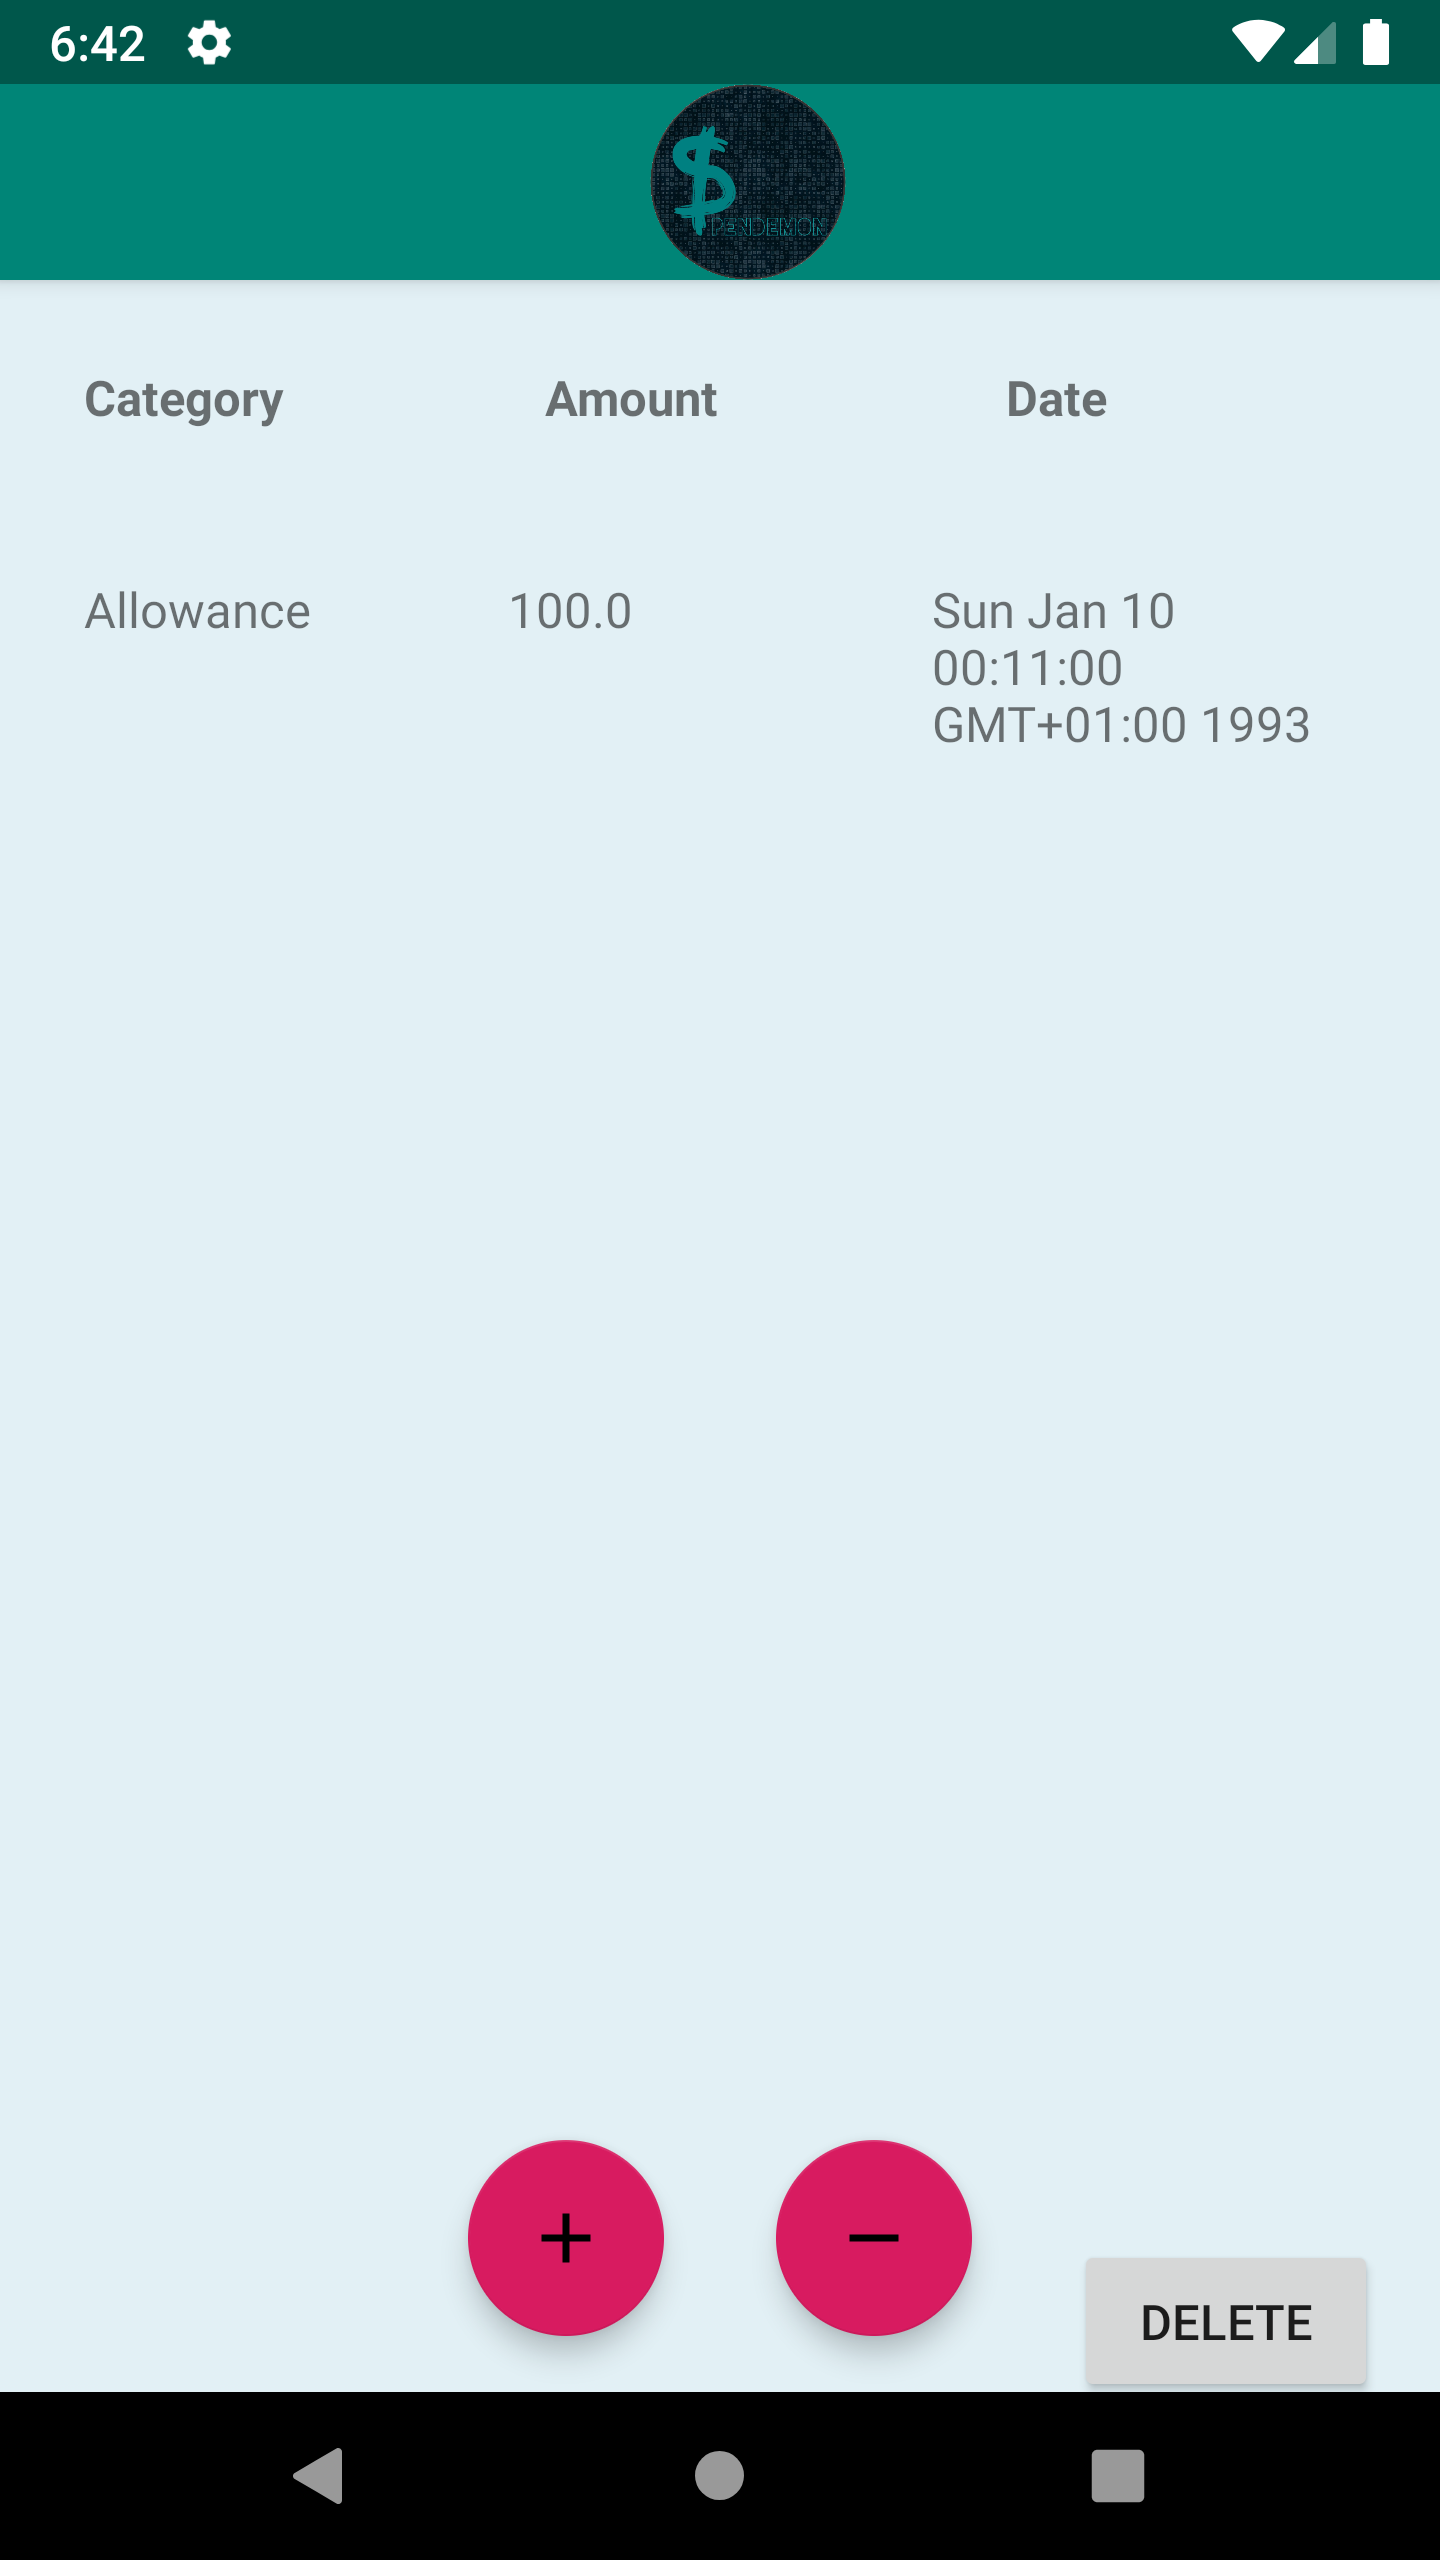
Here, we display the screenshots from our App which navigates from the Login page to the Main Activity page where one can see the daily, monthly, overall summary. On clicking Summary, it takes to the overall Summary table from which one can navigate to the Edit Data page where one can add their expenses and incomes with descriptions and dates etc.
 —
—
Storyboard 2:
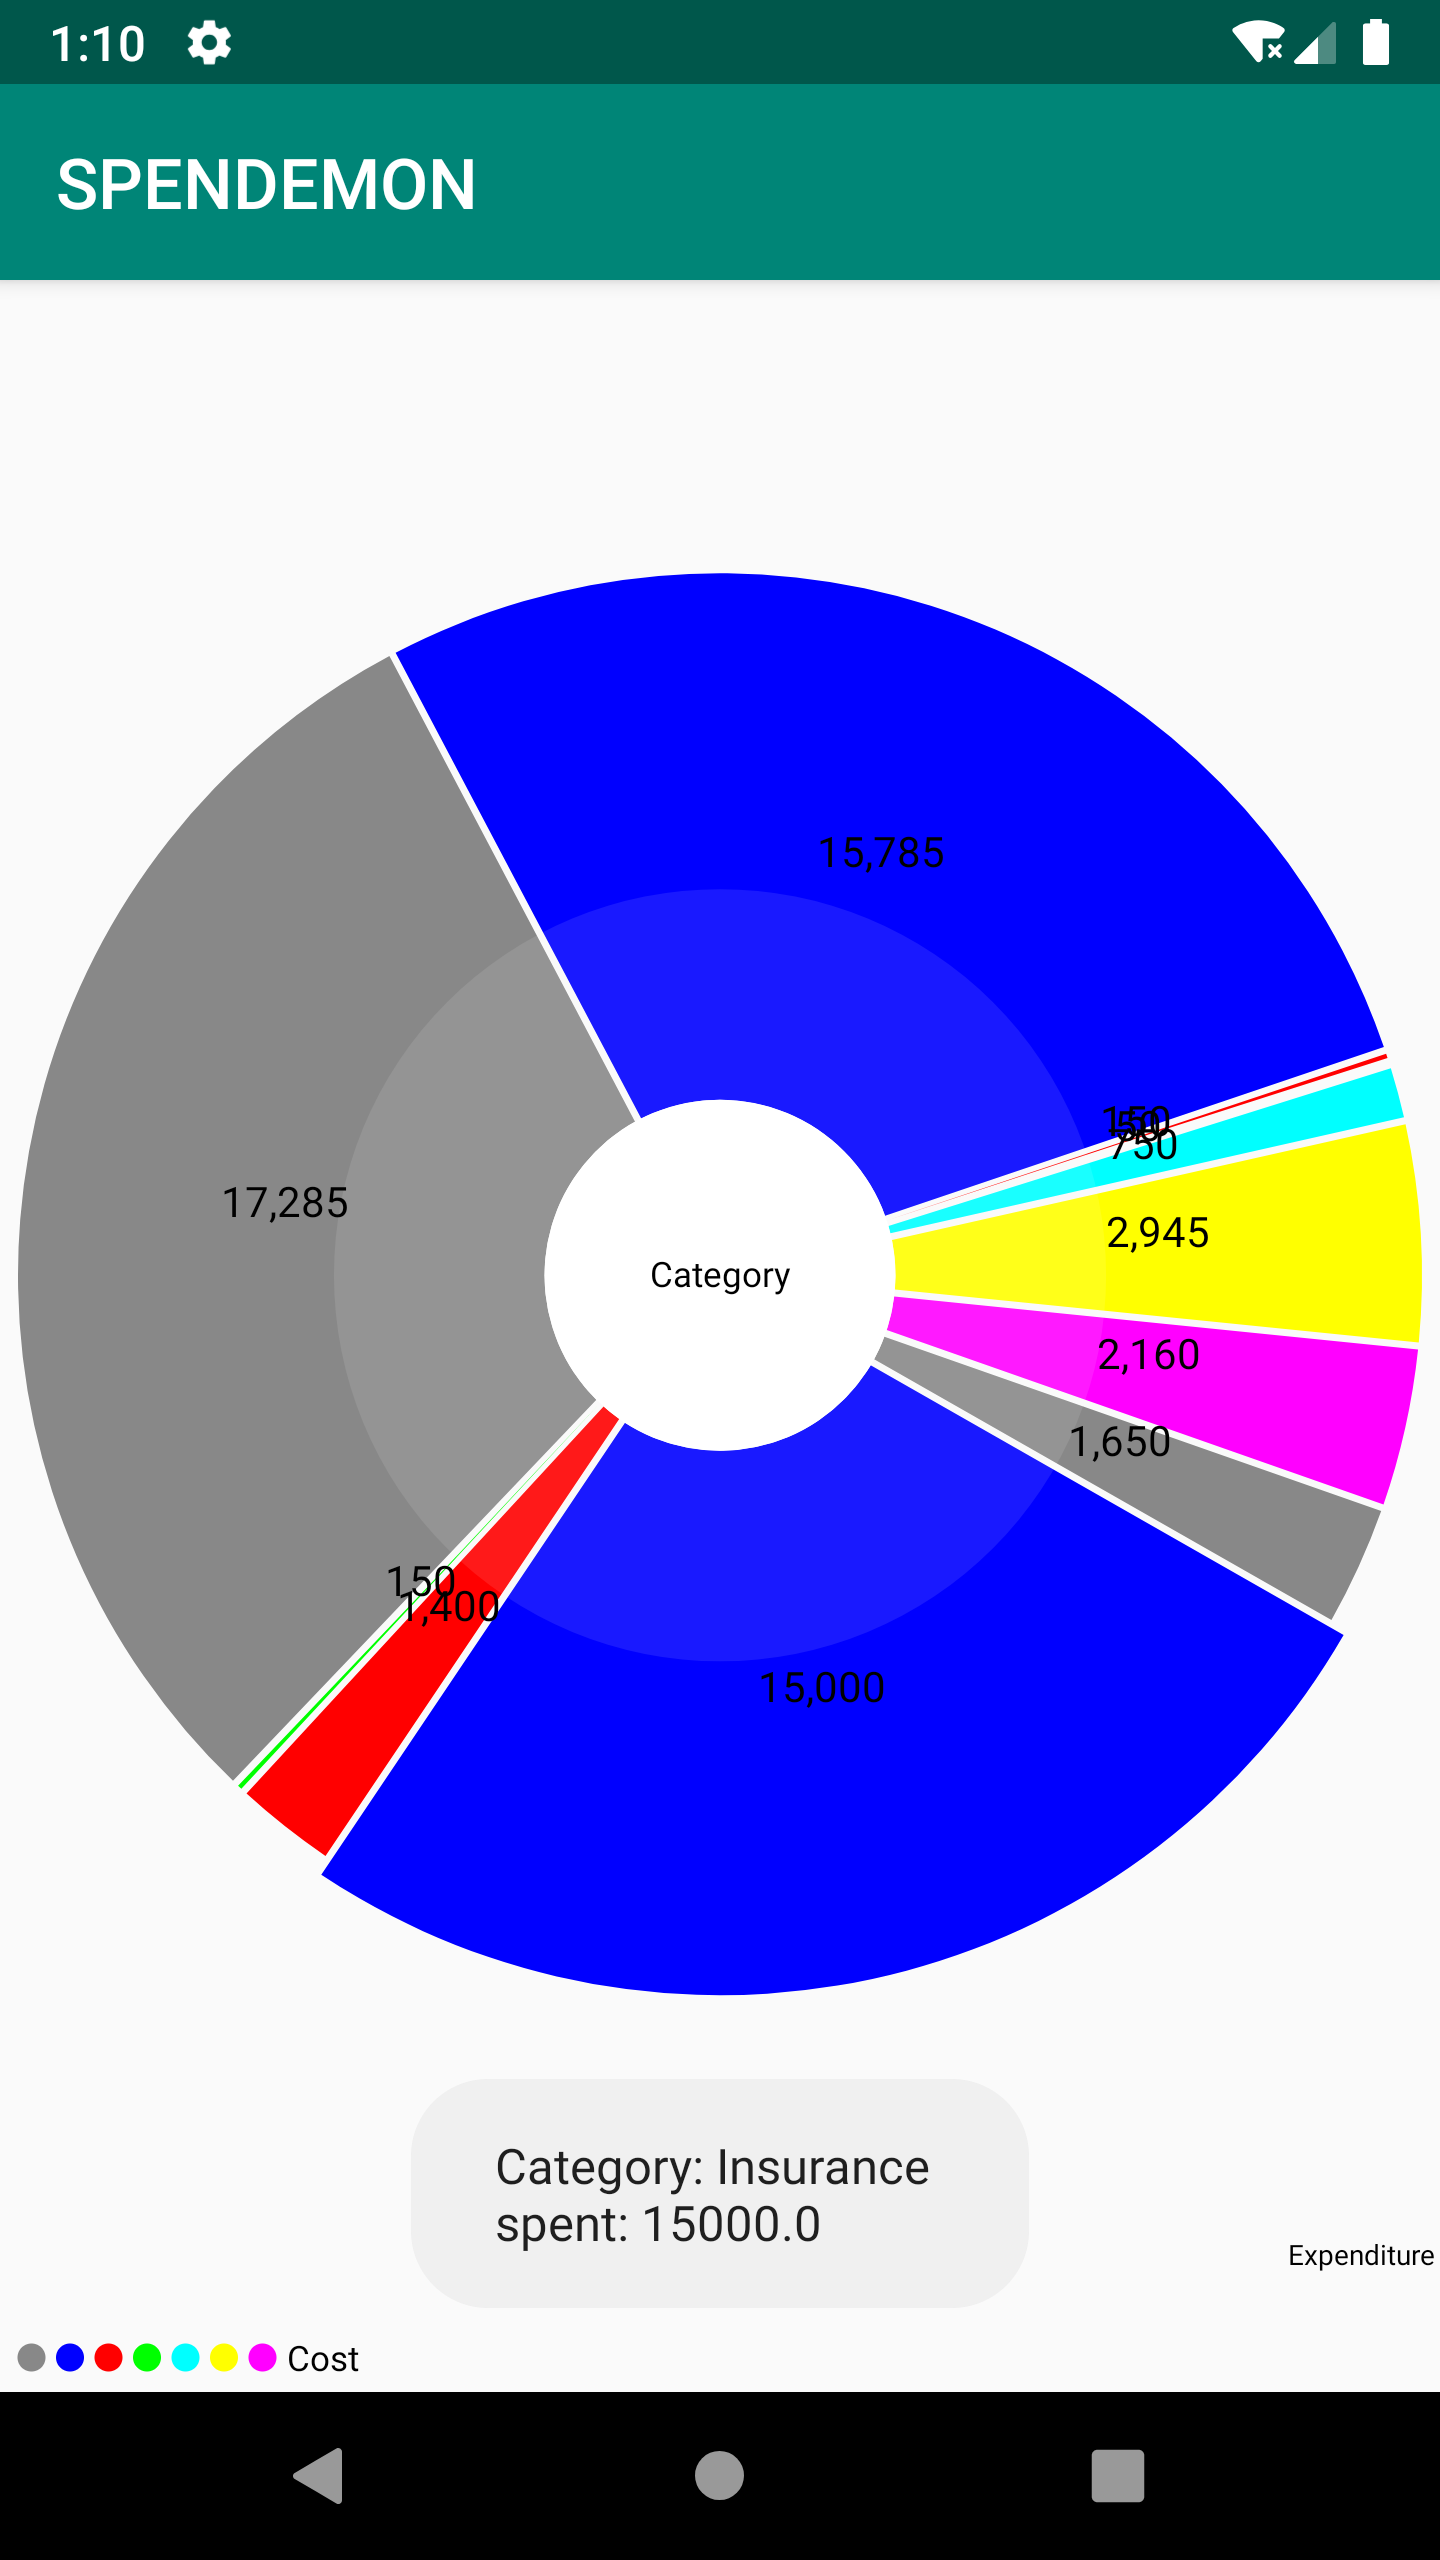
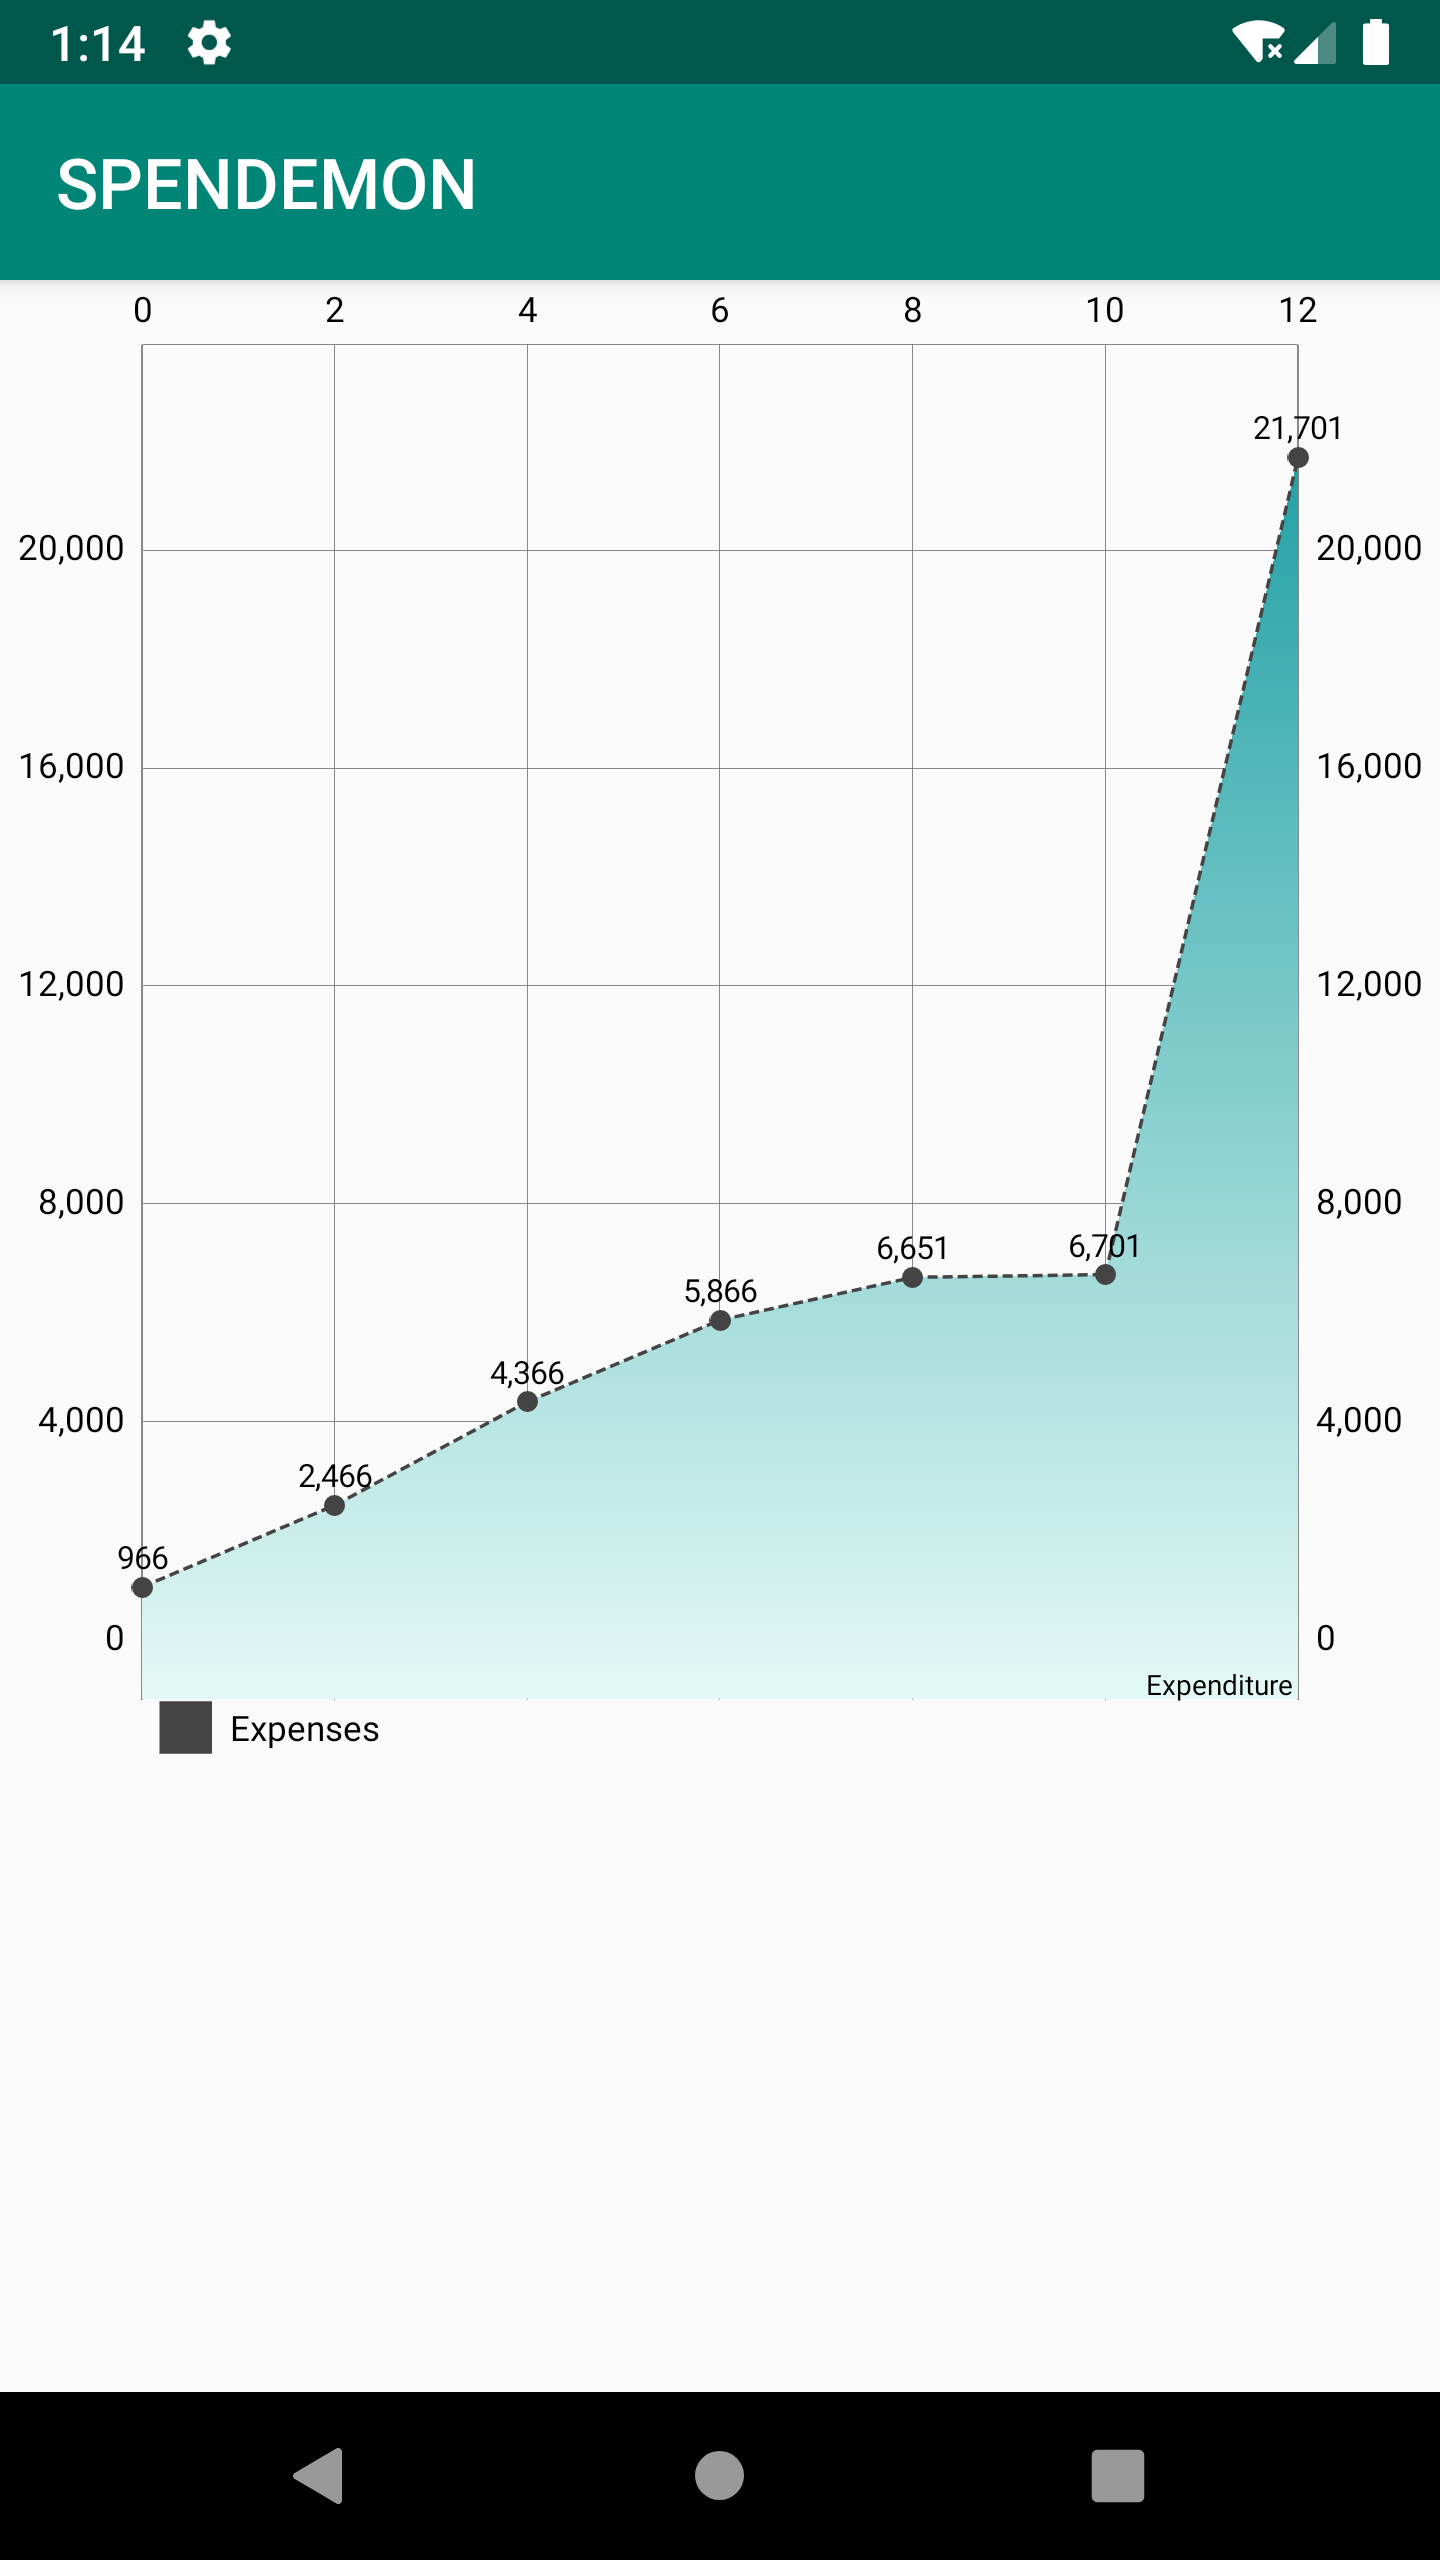
Here we have displayed the Graph visualizations for all the expenses in the form of a Pie chart and a Trendline.
 —
—
Design Principles: The basic idea behind our design choice is easy use of the App by the user and making the App such that one can have an easy and fruitful experience with it. The user should be able to keep track of his expenses and get an overview of his expenses in one quick glance. The basic design principles that we took into account are as follows:
-
Cut Out The Clutter
-
Create a Seamless Experience
-
Design Finger-friendly Tap-targets
-
Text Content Should Be Legible
-
Design Controls Based on Hand Position
-
Minimize Need For Typing
Summary of Changes:
As mentioned in the previous Blog, we started with a pretty simple App design which had a Login page, a Summary Page and an Edit Data page. Along with that we had implemented the Database as a simple JSON file which was pretty basic in it’s functionality.
Old version:
New version:
However, with the Advanced Prototype version we have tried to refine our App with the implementation of certain features to make our App more, well, App like. A summary of the added changes has been given below.
* Room Database implemented.

* Navigation Bar added.

* Charts feature added.

* Icons added for each category.

* Date Picker feature added.
The added features also were reflected the in the user stories as new additions an well as in the Class Diagrams which have been shown below:
Addition to User Stories:
* Easy visualization of expenses through graphs.
* Sort data by Date
* Add small descriptions to the expenses.
* Data stored in the Database permanently.
* Deal with Configuration changes, App rotations etc.
Addition to Class Diagrams:
* View Model Class
* Room Database Class
* Pie Chart Class
Final Thoughts:
The understanding of the User Interface Implementation and Design Pattern, helped in better understanding of both our App and the customers expectations from the App. Doing research on the Design Architectures opened up new windows for us to implement in our App and we are glad we could implement some of it into the App. We hopefully, have been able to create an App that will be able to assist our customers and shall be easy on usage.
We next intend to up our game some more by going into further detailing in our App and make it even more fun to use.
So stay tuned!! Tschüss!!