
Software Testing
Introduction
The quality of the software is measured on how much the software, component or process fulfill the customer needs and expectations. These qualities are of twp types. One, they are called as Quality in use and the second, is the internal/external quality.
The quality of the software can be ensured by testing the applicaiton. The testing is further divided into two types. They are static and dynamic testing.
Static testing involves the review of the software and it’s analysis is tool based. These tests does not allow the user to undserstand the movement of the application. It is always considers as a whole. Dynamic testing is analytical based which is further divided into Black-box testing and White-box testing. Here the testing is divided into classes or blocks.
Black-Box testing is done from the perspective of an end user to understand whether the intended funtionality is correct or not where the user will not have the knowledge about the nitty-gritty of the sorce code.
White-Box testing is done from the perspective of the developer to ensure the source code coverage and memeory leaks. It is directly dealing with the working of the source code.
Software testing Techniques
So, as above mentioned we wanted to verify and validate that the application was built according to the requirements and is functioning accordingly. Thus, we decided to apply the techniques of black box testing and white box testing.
Black Box Testing
This is also called as the Specification Based testing. The procedure of the Black box testing is first, to review the requirements catalogue, analyse the use case scenarios, build prototypes for each scenarios and comparing the actual and the expected result for each scenarios.
By this way we ensure that most of the use cases are verified and validated from the perspective of the user.
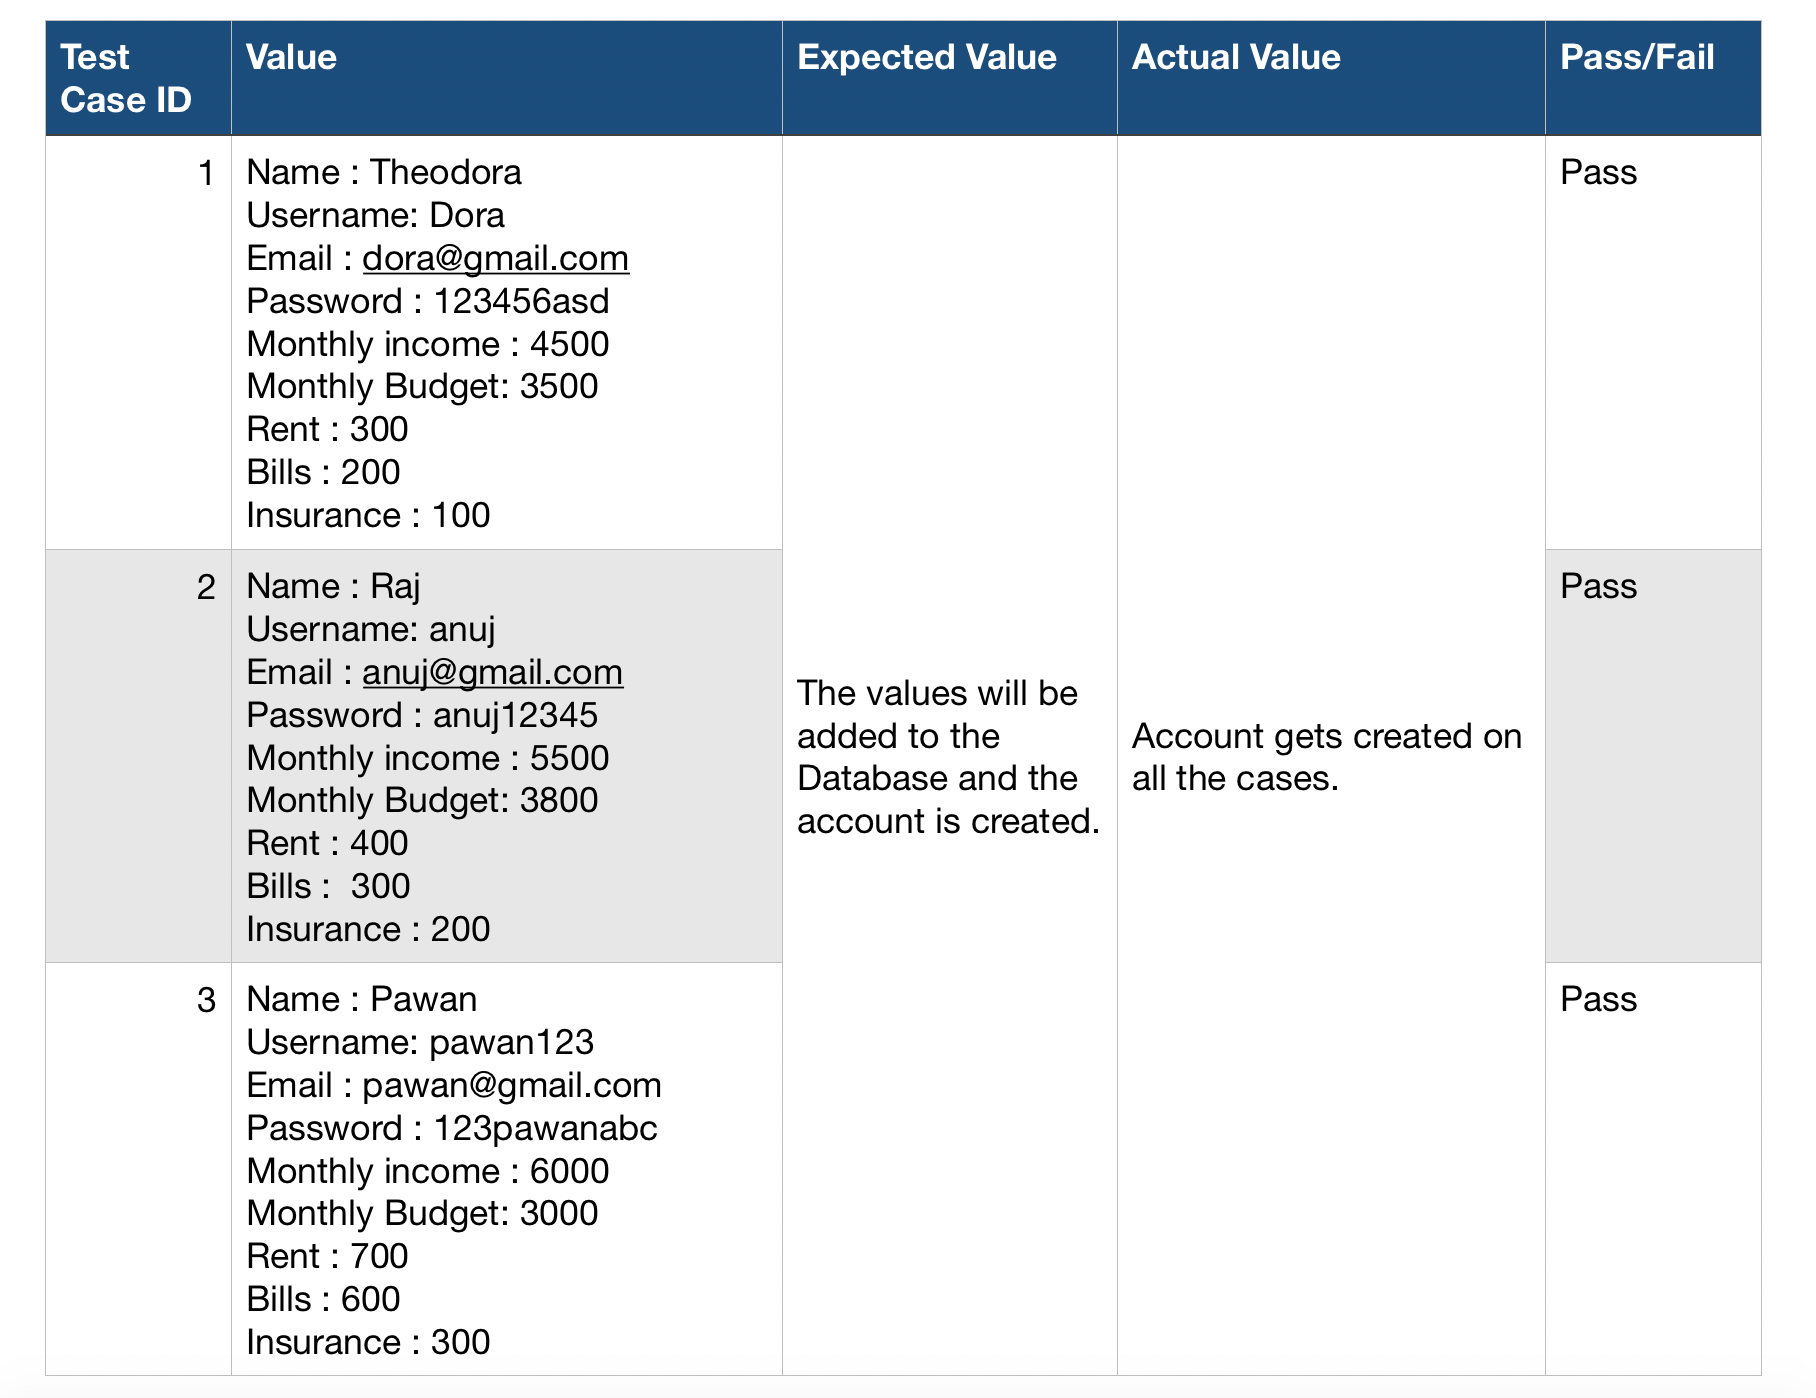
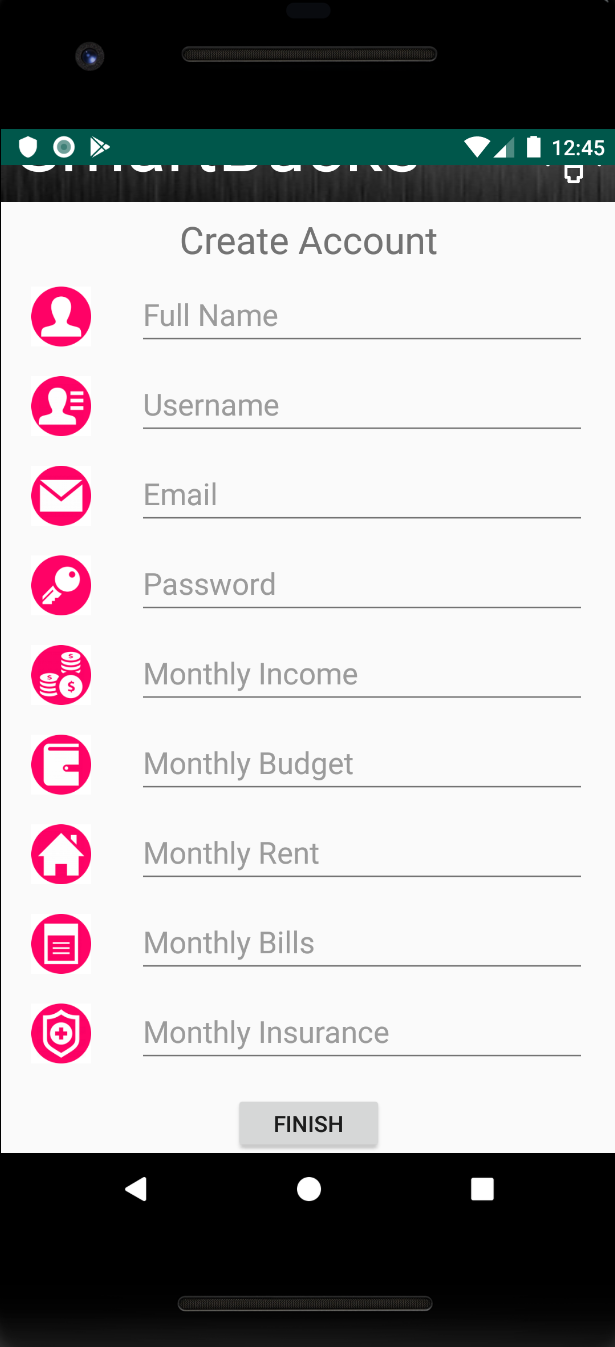
Use Case 1 - Creating an Account
Procedure:
- Open the Application
- Click Sign-Up button
- Enter the Details:
- Name
- Username
- Email Id
- Password
- Monthly Income
- Monthly Budget
- Rent
- Bills (Stable)
- Insurance
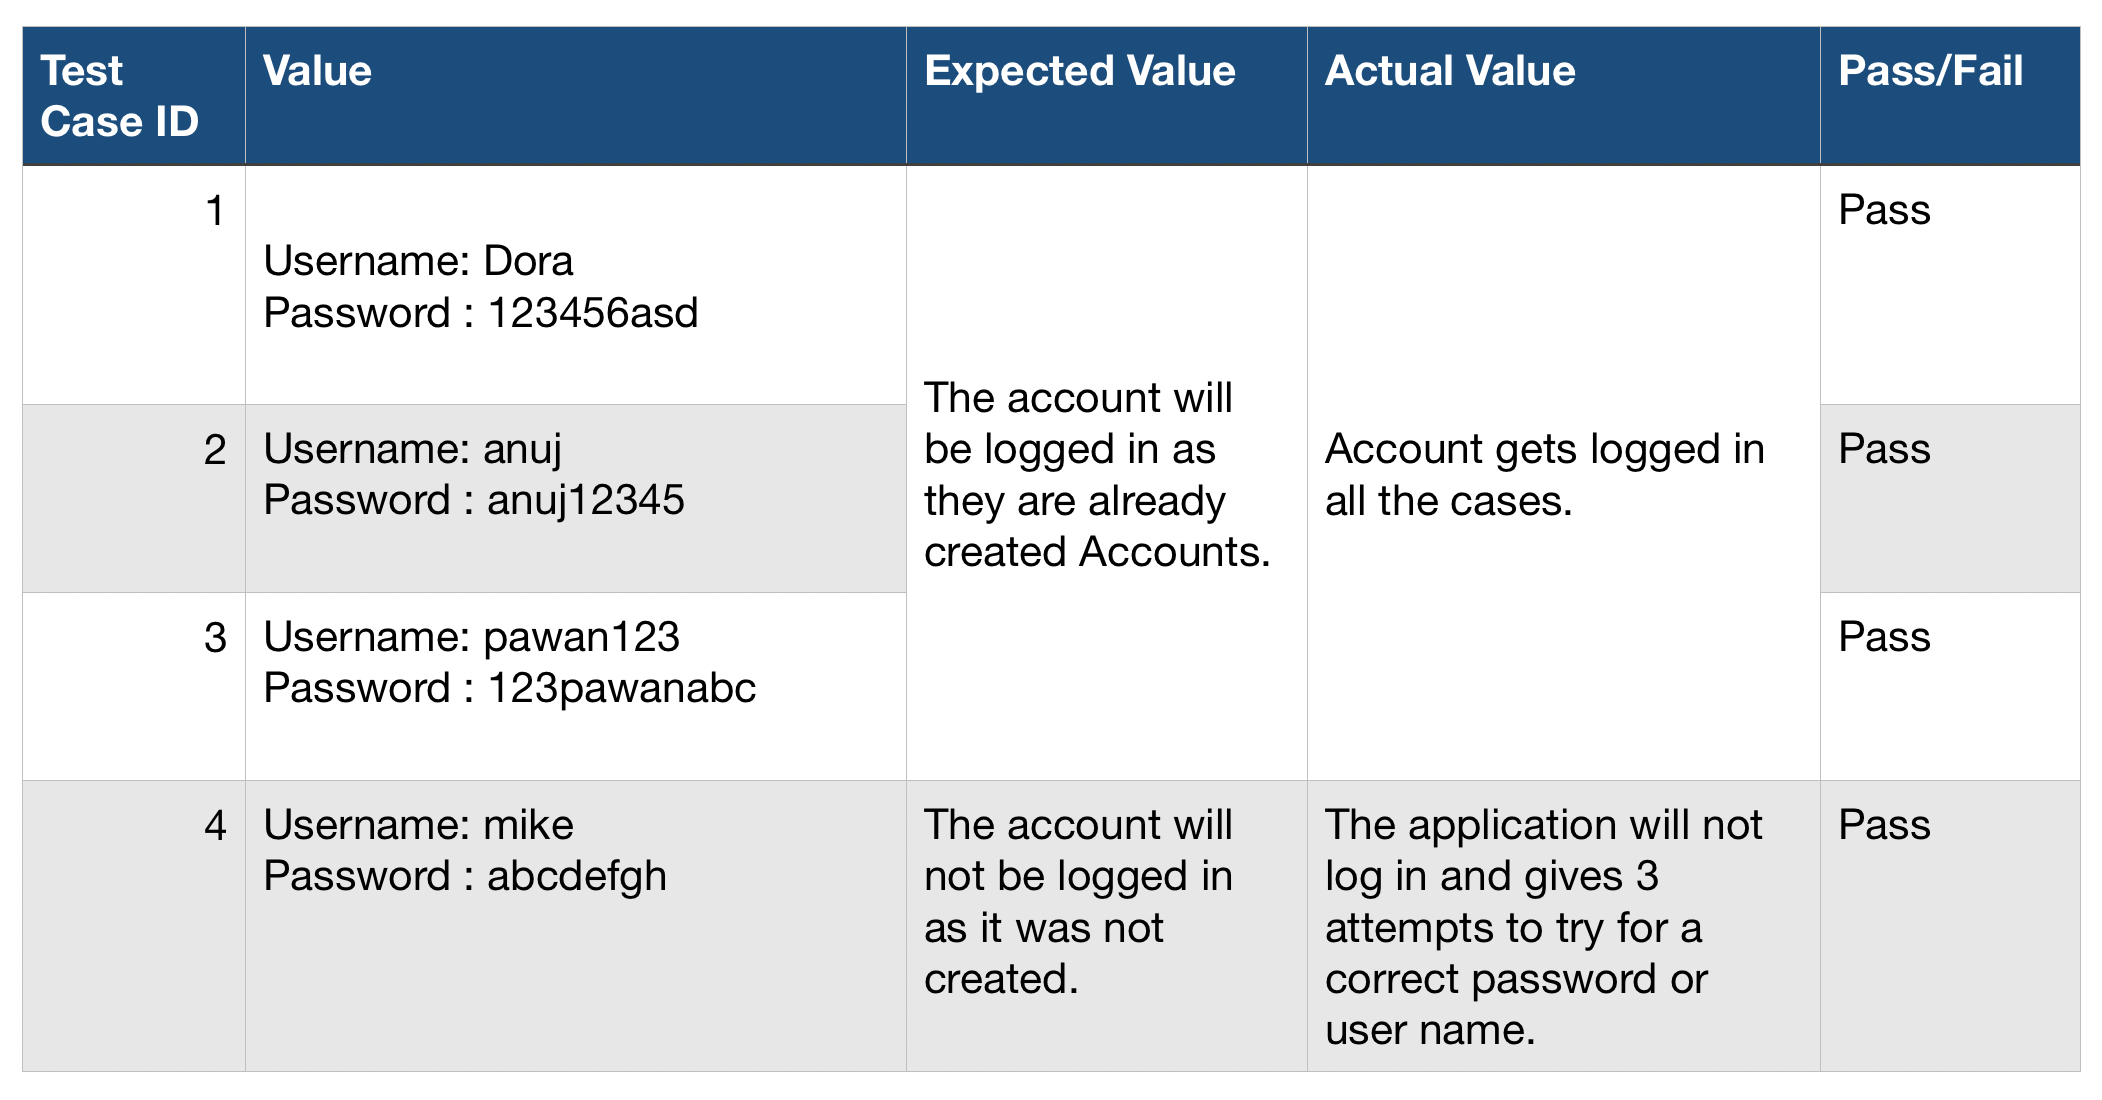
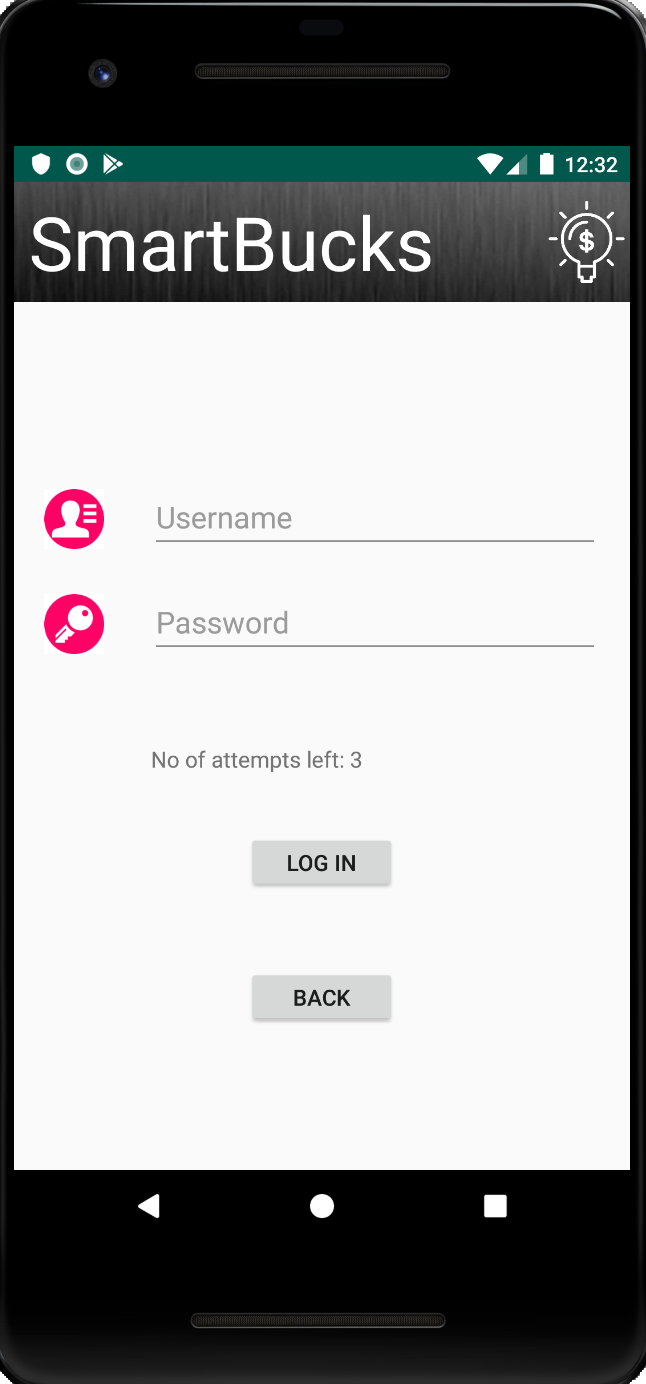
Use Case 2 - Log In
Procedure:
- Open the application
- Assuming that the user has already created the appliation, click the log in button.
- In the text edit fields provide the following the following details.
- Username
- Password
- Click Login
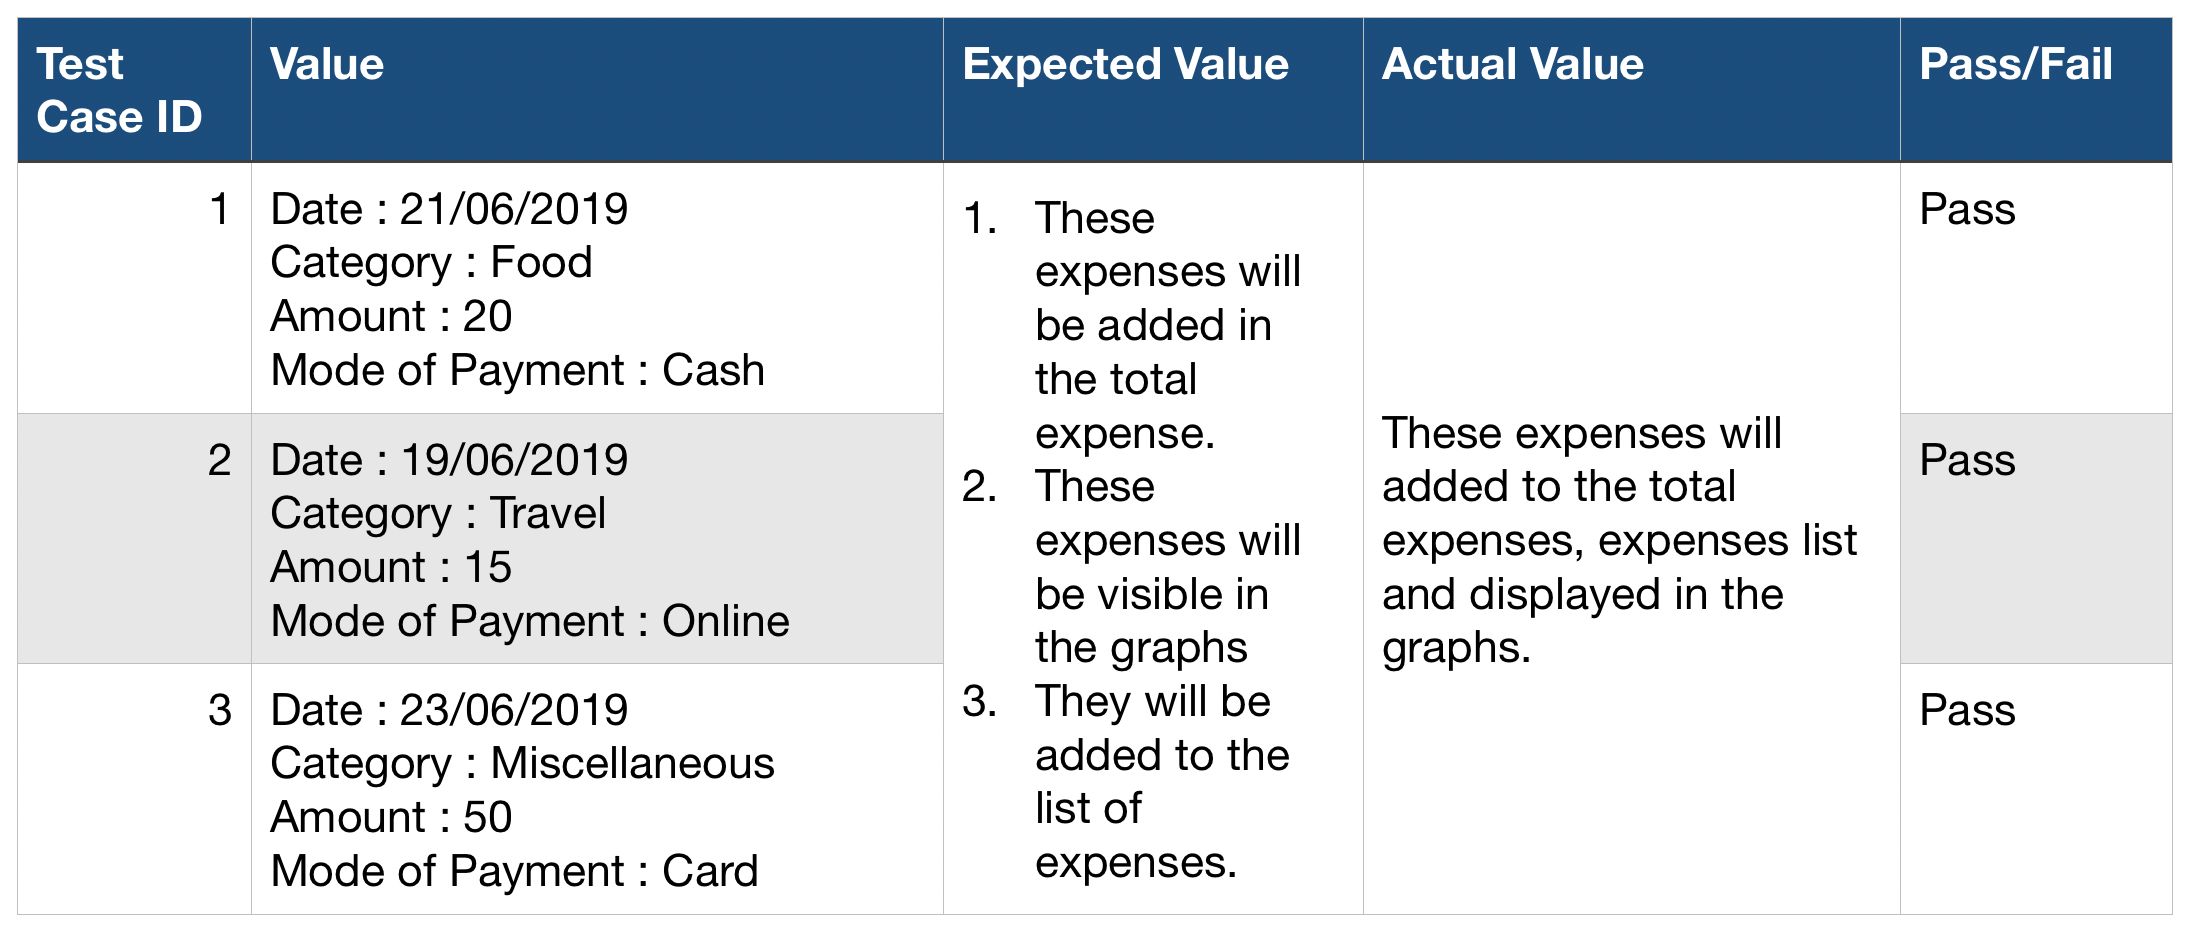
Use Case 3 - Adding an Expense
Procedure :
- Open the application
- Log in to the account.
- Press “Add Expense” button on the Home Page
- In add expense page provide the following details
- Select the Date
- Select the Category
- Enter the expense amount
- Select the Mode of Payment
- Click Confirm.
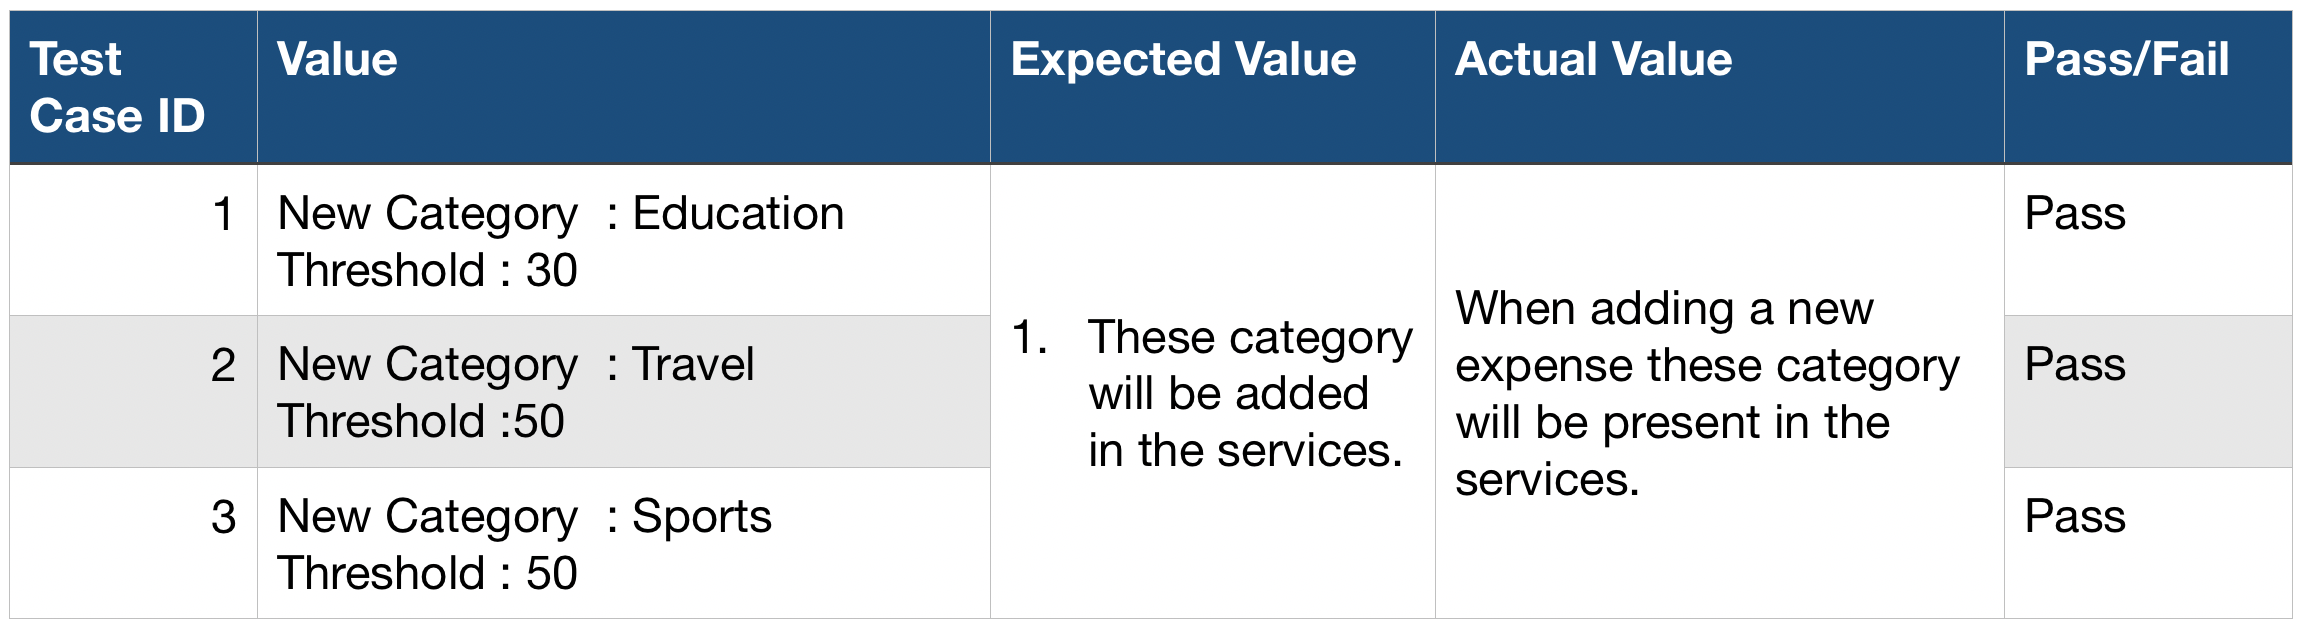
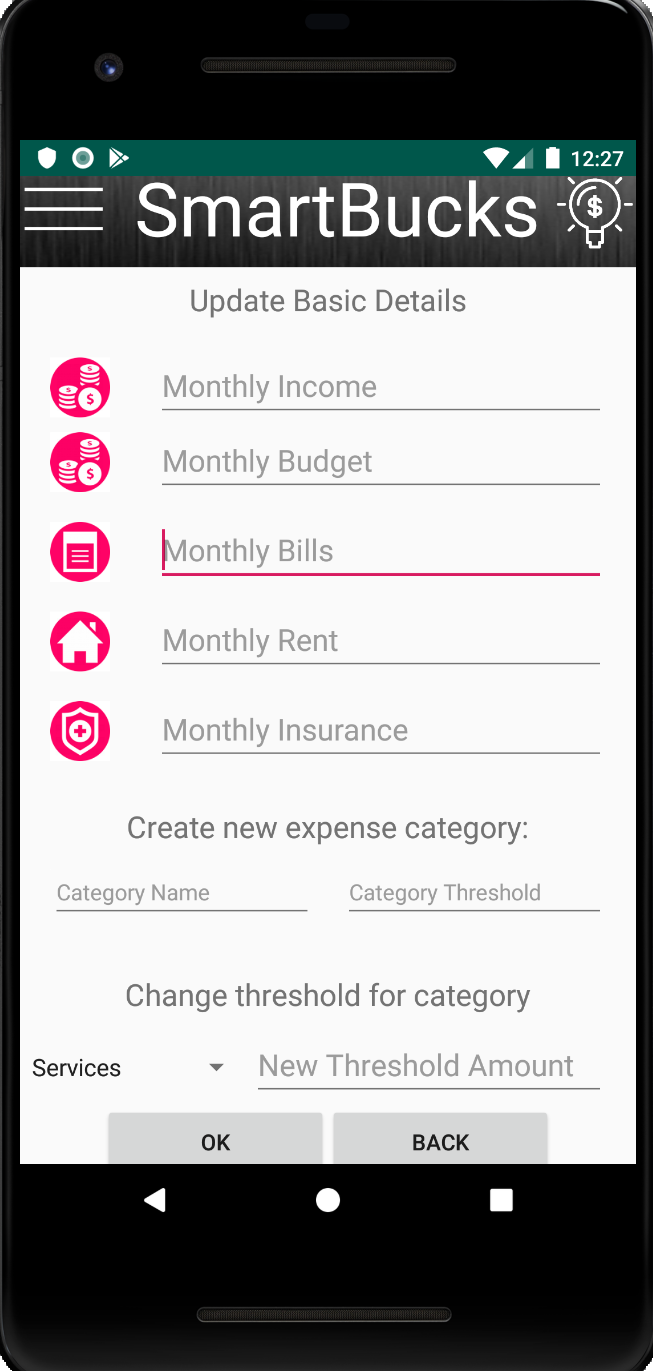
Use Case 4 - Creating a new Category
Procedure:
- Open the application.
- Log in to the application
- Click on the Menu option present on the top left corner of the application.
- Choose Update Details.
- Under “Create New Expense Category” provide the following details
- New category name
- Threshold for that category
- Click Ok.
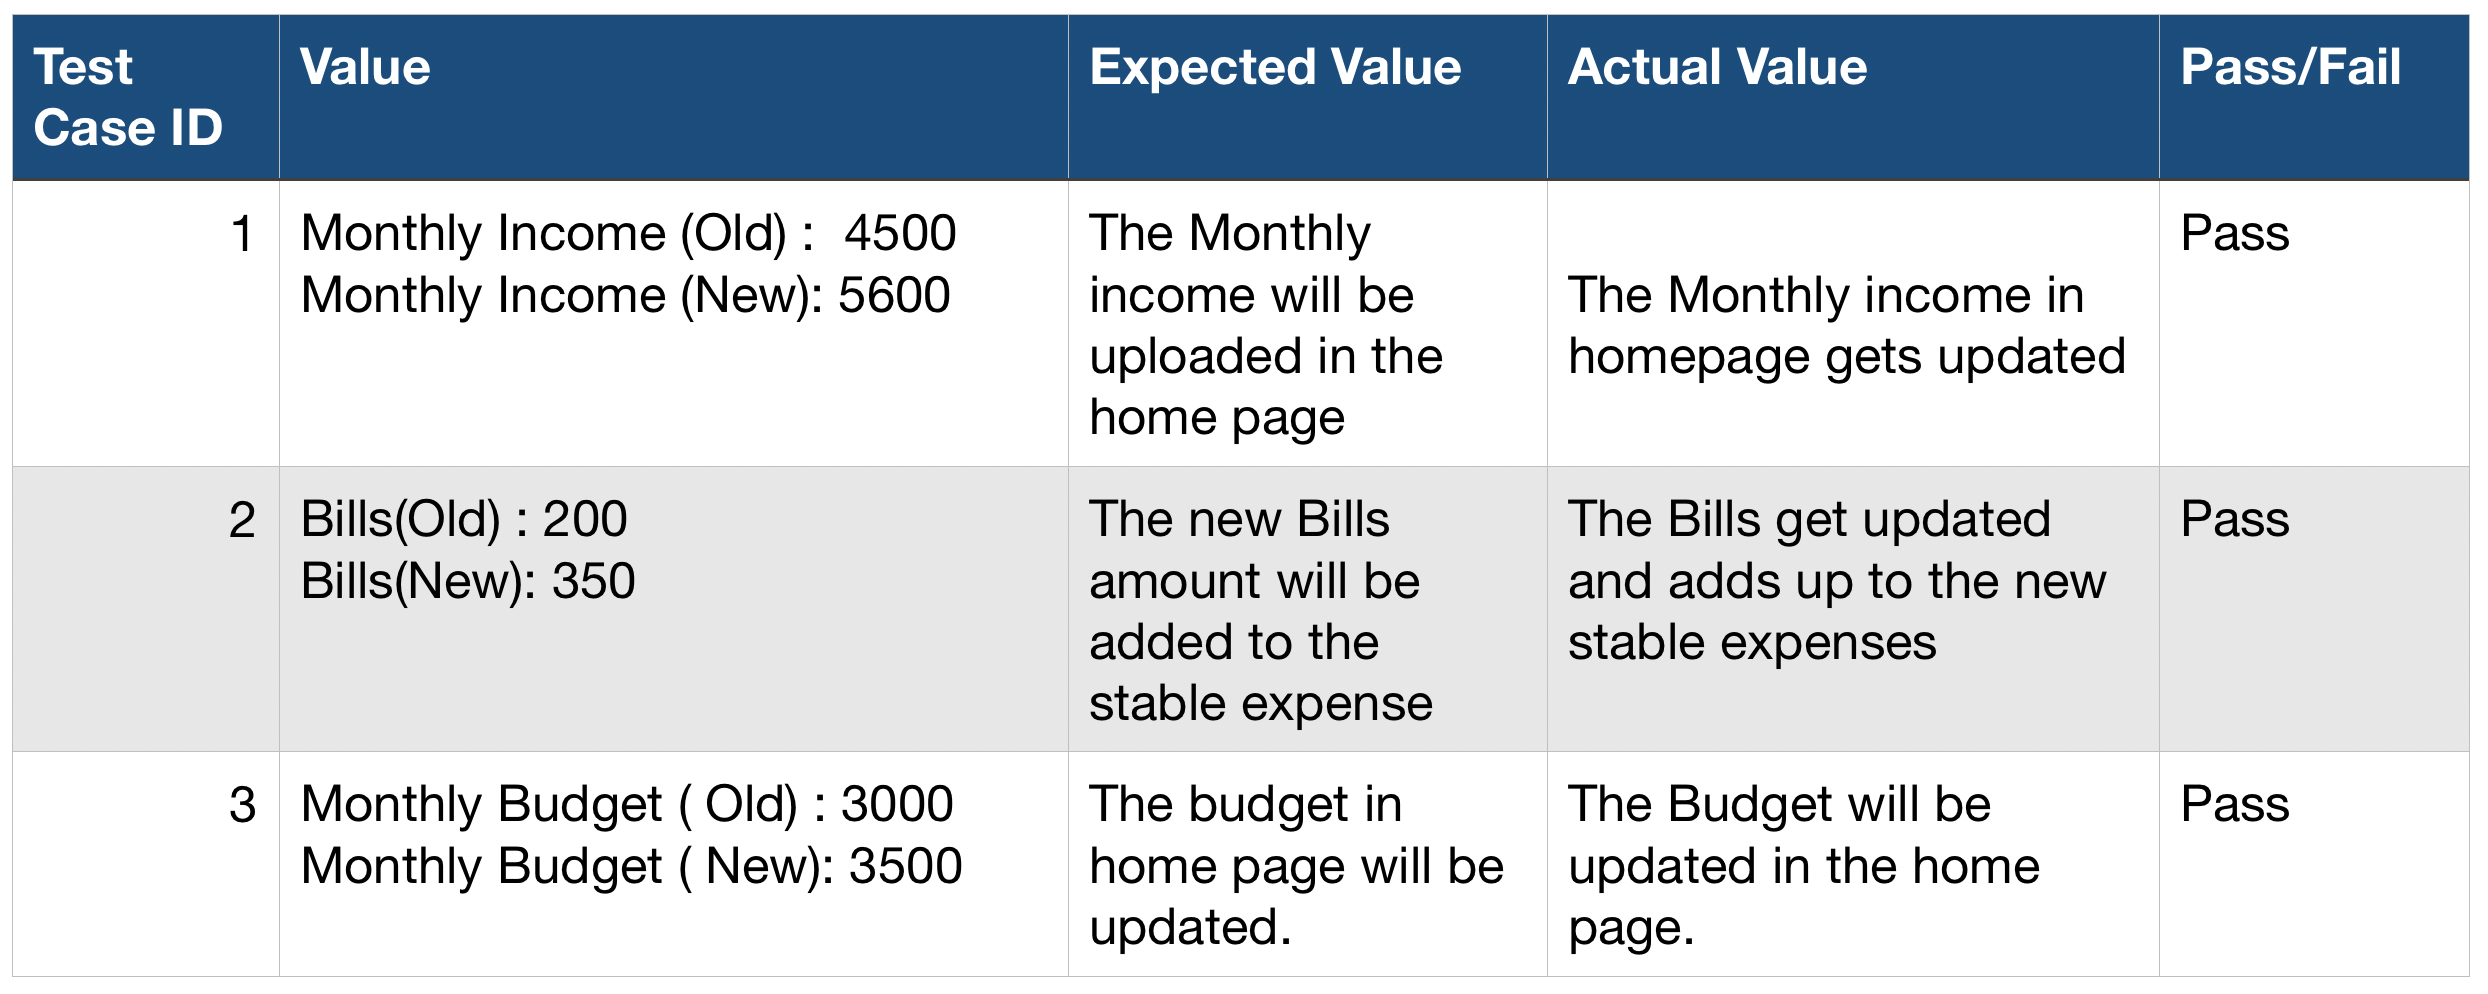
Use Case 5 - Update Details
Procedure:
- Open the Application.
- Log in to the application.
- Click on the Menu option present on the top left corner of the application.
- Choose Update Details.
- In the Update Details activity, update any of the following fields with respect to the uasge.
- Monthly income
- Monthly budget
- Rent
- Bills
- Insurance
- Threshold of a Catergory (Service)
- Click Ok.
White Box Testing
The goal of WhiteBox testing is to verify all the decision branches, loops, statements in the code.
Mainly during the application development process of our app, we used the Unit testing white box technique. It is often the first type of testing done on an application, which is performed on each unit or block of code as it is developed, from the same people who created the code. It helped us identify a majority of bugs, early in the software development lifecycle.
The classes we selected to develop test cases for, at the current beta version of our app are:
- createAccount.java
- login.java
- updateDetails.java
- addExpenses.java
- addIncome.java
Class 1 - createAccount.java
 The createAccount class contains the methods onCreate(), routed(), validate() and addData().
Since this class is responsible for checking the user input of the data inserted from the user while he’s registering to the app, we will check some test cases of different data input.
-
Name = Theodora K., Username = Theodora K., Email = dora@gmail , Password containing 4 characters, Income = 2000, Budget = 1000, Rent = 1200, Bills = 50, Insurance = 30
-
Name = Theodora K., Username = theodora_k , Email = empty, Password containing 6 characters, Income = 2000, Budget = 1000, Rent = 800, Bills = 50, Insurance = 30
-
Name = Venkatesh M., Username = venkyv, Email = venky@gmx.de , Password containing 8 characters, Income = 1000, Budget = 500, Rent = 200, Bills = 50, Insurance = 30
Common steps is that in every case the onCreate() and routed() method are executed, because the first is used to call the parent class constructor, starting the activity, connecting the xml and setting up the code for the “Finish” button listener, without implementing extra functional code, while the routed() simply sets the text field and button views to objects that can be used from the backend. Therefore we are not going to be testing these two methods.
For this sample test cases, we need to test the code flow in our validate() method, where every input field is checked and if the result is not correct then there is a toast message displayed. Only if the validate() returns true then the addData() is executed.
When user clicks the finish button, the code that is being followed is
if (validate())
	addData();
Validate() contains a total of 6 if conditions:
-
Checking if all input fields are empty or not: Test cases #1 and #3 would pass this condition, but since #2 has not given an email there would be a toast prompt saying all input fields must be given.
-
Username contains only a-z,A-Z,0-9, _ : We are making this check to make sure the username is correctly stored in the database without any conflicts. Test case #1 would fail this check, because the username has a gap and a dot.
-
Username already exists in database: We use the isUser(String username) method of our database helper class called dbHandler, to check if the specific username provided is already taken, test case #3 passes cause there was no other user with the given username.
-
Email form: Test case #1 wouldn’t pass this control but #3 does.
-
Password length > 6: #3 passes cause contains 8 characters.
-
After the administratory details, we check the numbers entered. General rule is that budget shouldn’t be less than the difference of the income minus the stable expenses.
if((inc - (rent + bill + ins)) < bud) {
//we have to ensure that budget is less than income minus stable 	expenses
Toast t = Toast.makeText(createAccount.this,"Budget cannot be less than income - stable expenses", Toast.LENGTH_LONG);
t.show();
}
This comparison serves two things, 1. checking if the income is bigger than sum of stable expenses and budget 2. checking budget is sufficient . Therefore, in the test case #1 this would be false because 2000 (inc) - (1200 rent + 50 bills + 30 insurance ) = 720, these are the remaining money defining max budget and the user specified a budget of 1000 therefore the app will prompt him to decrease their budget. For #2 and #3 it would be a valid control (1120>1000, 720 > 500).
After validate() returns true, addData() simply calls the database handler method for adding a new user addUser(User), and displays a prompt message if the addition to the database was made successfully or not.
Testing Result:
We were able to identify a not-needed if condition in our validate() method regarding the control of income and stable expenses entered, which we removed after performing this test.
Class 2 - login.java
 This class is responsible for checking the username and password and let the user access the homepage.
The test cases we developed we different data input at each case are:
-
Username: dora_k Password: ** (user doesn’t exist -incorrect password)
-
Username: pawan_k Password: empty
-
Incorrect data entered more than 3 times
-
Username: raj123 Password: ** (user exists- incorrect password)
-
Username: raj123 Password: ** (user exists- correct password)
When the user hits the login button, first control occurring in the onCreate() method login button listener is whether all of the text fields are empty or not. Test case #2 would get rejected because there is no password specified and the user would be prompted to enter all fields.
For the rest of the cases which would move on to the code, we check first with the dbHandler method isUser(String username) if the specified username corresponds to a user, and if it doesn’t we prompt a corresponding message. The test case #1 would be prompted of the nonexistence of this username. The checkAttempts() method would be called and would reduce the remaining amount of login attempts left , with 3 being the number of starting attempts.
Next if condition included in the login button listener is the result of the checkPwd(String username, String password) method, that uses the md5(String password) method of the dbHandler to encrypt the given password string and check if it is equal to the one stored for the user in the database, and return back the result of the comparison. Since checkPwd() would return false, Test case #4 would be prompted that username and password doesn’t match and checkAttempt() would reduce number of login attempts.
In case someone tried to enter more than 3 times their credentials, which would be Test case #3, the login button would be disabled originally from the checkAttemtps() method, and at the same time on the onCreate() where the enabled status of the button is checked, when it’s detected to be disabled, a timed thread would run and enable it again after 5 minutes .
//renewable after 5 mins
if (!login.isEnabled()) {
new Handler().postDelayed(new Runnable() {
@Override
public void run() {
login.setEnabled(true);
}
}, 5000);
}
In case the checkPwd() returns true, which means username and password match, we fall in case #5 where the user is redirected to the homepage.
routeBack() method of our class was not tested significantly because it simply redirects the user back to the initial main activity.
Testing Result:
The incorrect attempts were not counted when the username couldn’t be found in the database because we weren’t calling the checkAttempts() method after entering the specific if condition, so the problem was fixed.
Class 3 - updateDetails.java
 This class is checking the data the user enters when he wishes to update the initial account details. We are using the onCreate(), updated(), updateCats() methods to check and update the data when the user hits the ok button. The methods onItemSelected() and onNothingSelected() refer to the implementation of the drop down list and therefore will not be tested.
The sample test cases we’ll be examining are:
-
Budget: 1000 (Current Use Income: 1000),
-
No values entered
-
new category: “travel”, threshold of “travel”: 200 (Current budget:500)
-
New threshold for “leisure” : 30 (Current budget:500)
When the user hits the ok button, the updated() method is called, where there is a general control whether any values were entered or not, and if there is any value entered then we are performing an update for these new values. This is managed by updating the User() object when we check for a non-empty value of the appropriate edit text view.
Therefore in case #2, the user would get prompted to enter some value.
In case #1, after there is a value entered and detected from updated(), just like in createAccount() we would check for the budget to be less or equal to the income without the stable expenses of the user, therefore the user would be prompted to either decrease budget or increase income. The user would also get a prompt in case #3, which is about adding a new category. The updateCats() methods works for checking the text fields of new category name, new category threshold and updated threshold. In this case both of the first two fields are completed, and the algorithm proceeds with checking whether or not the total budget of the user is bigger than the sum of all the existing thresholds, along with the new threshold added. Since it’s the first time the user adds a new category, the rest of the thresholds are set to the default price ( every category gets the result of the division of user’s budget and amount of default categories which is 5, so in our case 500 / 5 = 100 money units of threshold for every category). In the condition of budget > sum of thresholds ( 500 > (200+4*100=600)) the result would be false, therefore the user would be prompted to increase his budget or decrease one of the existing categories’ thresholds.
if((sum + upThres) > usr.getBudget()) {
Toast t = Toast.makeText(updateDetail.this,"Total of thresholds with " + updatedCat +" are more than budget." +
"Please increase budget or decrease another threshold" ,Toast.LENGTH_LONG);
t.show();
}
Now in test case #4, supposing the user wants to cut down on leisure for this month, he decreases the value of this category to 30 money units. Since his budget is 500 and the sum of the rest of the category thresholds is less, the updateCategory() method of the dbHandler is executed and the activity is refreshed so that the user can see the new list of categories in the drop down list, as generated inside the onCreate() method .
Testing result
There weren’t all the correct checks performed inside the updateCats() methods regarding the budget so they were added. There was a problem with the update of the threshold when the drop down list was reloaded and it was also fixed.
Class 4 - addExpenses.java
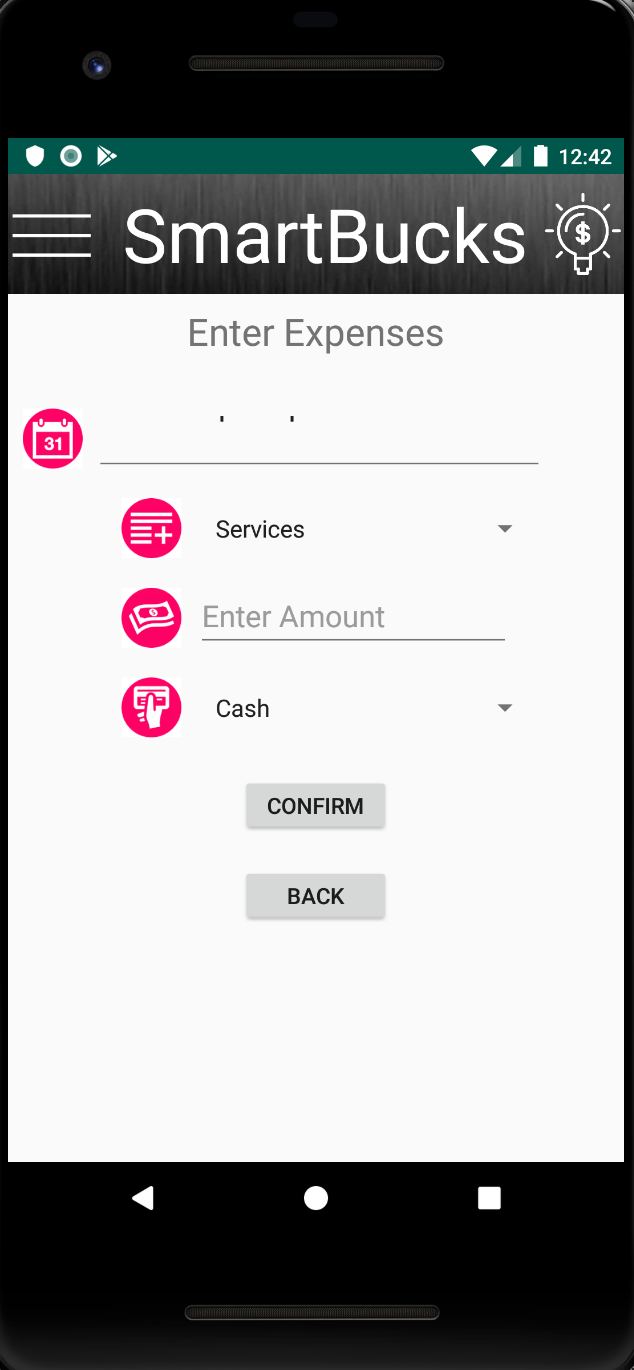 Apart from the onCreate() method, we use the checkInput() method to check the data added from the user when he wants to add a new expense.
The methods updateLabel() (for date picker), onItemSelected() and onNothingSelected() (for drop-down spinner elements) are used complimentary and therefore won’t be tested.
The sample test cases we will be examining are:
-
Entered amount but not selected date
-
Entered amount bigger than category threshold
When the user clicks the confirmation button, the first thing that’s being checked inside the button listener is if the date or amount is given(the drop down lists are always containing default selected values), therefore in case #1 the user would be prompted to choose a date for the expense.
In case #2, all the fields would have a value therefore we would jump to the checkInput() method. First check is if the amount value is positive, and since it is we would move to the second if condition, that’s if there are already some expenses given, count their sum and together with the amount of the new expense check if they overcome the threshold of the new expense’s category. If so, prompt the user at the addition of the specific expense. If the threshold is not overpassed, he merely sees a success toast notification.
Testing result:
Initial incorrect check of budget fixed, user was able to choose a future day for adding expense so a max date was set to today.
Class 5 - addIncome.java
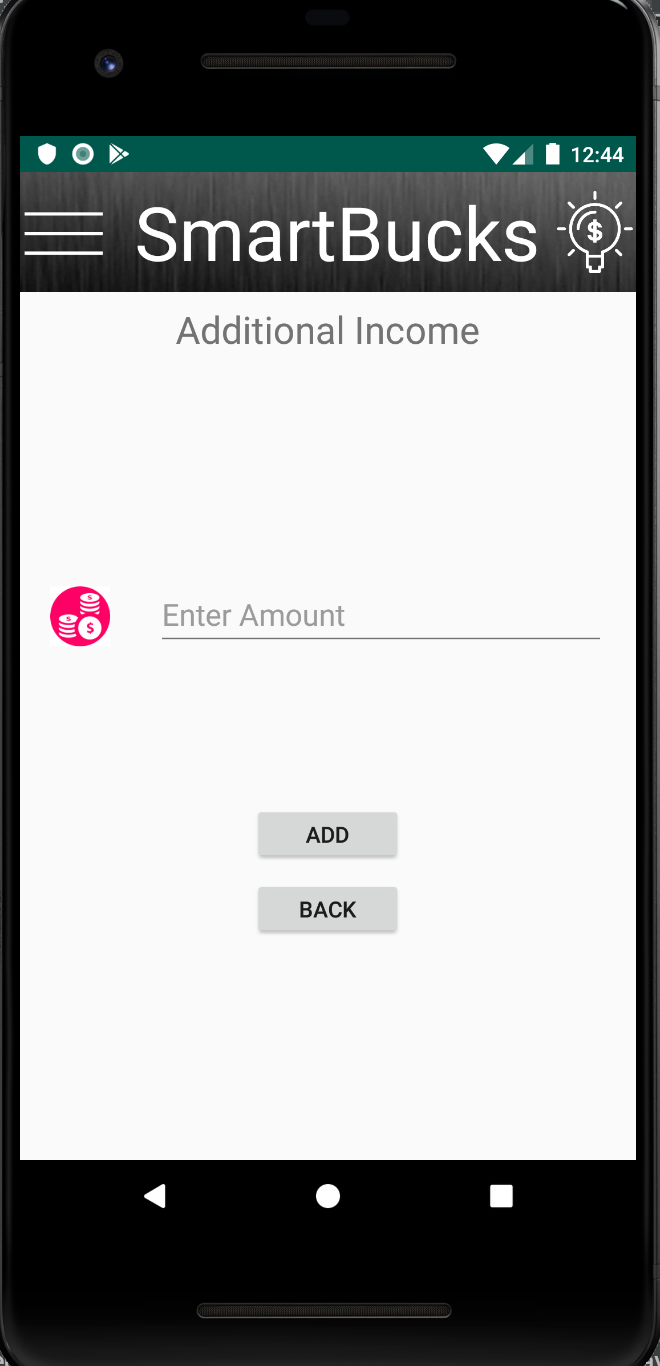 addIncome is a simple class adding the amount entered as additional to the total income of the user, through the validate() and addData() methods.
The sample test cases we will be examining are:
-
Empty field given
-
Any value different than 0
Inside the confirmation button listener, included in the onCreate() method, the boolean result of the validate() is checked in an if condition. Validate() checks 1st for empty input field, therefore case #1 would be prompted to fill in a value. Second if condition is whether the value of the amount entered is a number different than zero (since input keyboard is set to number decimal the user is not able to click the minus symbol and enter a negative value), so the test case #2 would pass the control and jump to the addData() function, where the user’s income is updated with the updateUser() method of the dbHandler, by adding the amount to the current user income. User gets a success prompt.
Summary of Changes
- Addition of user categories table:
- For each new account creation, there is a user categories table created containing two columns.One that holds all of the categories’ names and second one for holding the amount of money set as threshold for the specific category. There is a default value of 50.0 money units set as limit for the five basic categories. Of course, the user can add a new category or modify one that doesn’t exist by changing the threshold set for it.
- Addition of multiple graph statistics display:
- The user is able to view the sum of his expenses per day of the most recent week, per week of the most recent month and per category, all in a modern graph view directly from the homepage.
- Addition of list of expenses:
- User is able to view his last transactions sorted by date from a homepage button.
- Addition of SmartBucks report:
- The user is able to download the report as a pdf directly from the menu options. The pdf includes a list with his last transactions (more statistics to be added)
- Created lineGraph and sbMenu classes:
- All the methods used to display graph data are included in the lineGraph class and we simply call an object of the class in the homepage, and same for sbMenu (stands for SmartBucks menu) all the redirects and the code needed for the menu options are held in this class and an object is called for every activity where the menu is displayed
The Beta version of the application is available for download in the following link: https://github.com/DBSE-teaching/isee2019-SmartBucks/blob/devel/theo/iseeproject/app/release/app-release.apk